How to Use AI Mocap in Blender: Step-by-Step Tutorial
Creating realistic character animation has always been a challenging part of 3D production. Traditional motion capture workflows often require expensive equipment, dedicated studios, and complex setups, while manual keyframe animation can take hours or even days for a single sequence.
With AI Motion Capture technology, creators can now generate high-quality motion data from videos or text prompts and bring those animations directly into 3D software like Blender.
By combining AI Mocap with Blender, you can quickly create character animations, test ideas, and build professional 3D content without traditional mocap equipment.
In this guide, we will show you how to use AI Mocap in Blender step by step, including generating motion, importing animation data, retargeting motion to your character, and preparing the final animation.
What You Need Before Using AI Mocap in Blender
Before starting the workflow, prepare the following:
· A rigged 3D character
· AI-generated motion data
Your character should have a proper armature with a humanoid skeleton. A compatible rig makes it easier to transfer AI-generated motion to your character. Once your character and motion files are ready, you can start the AI Mocap workflow.
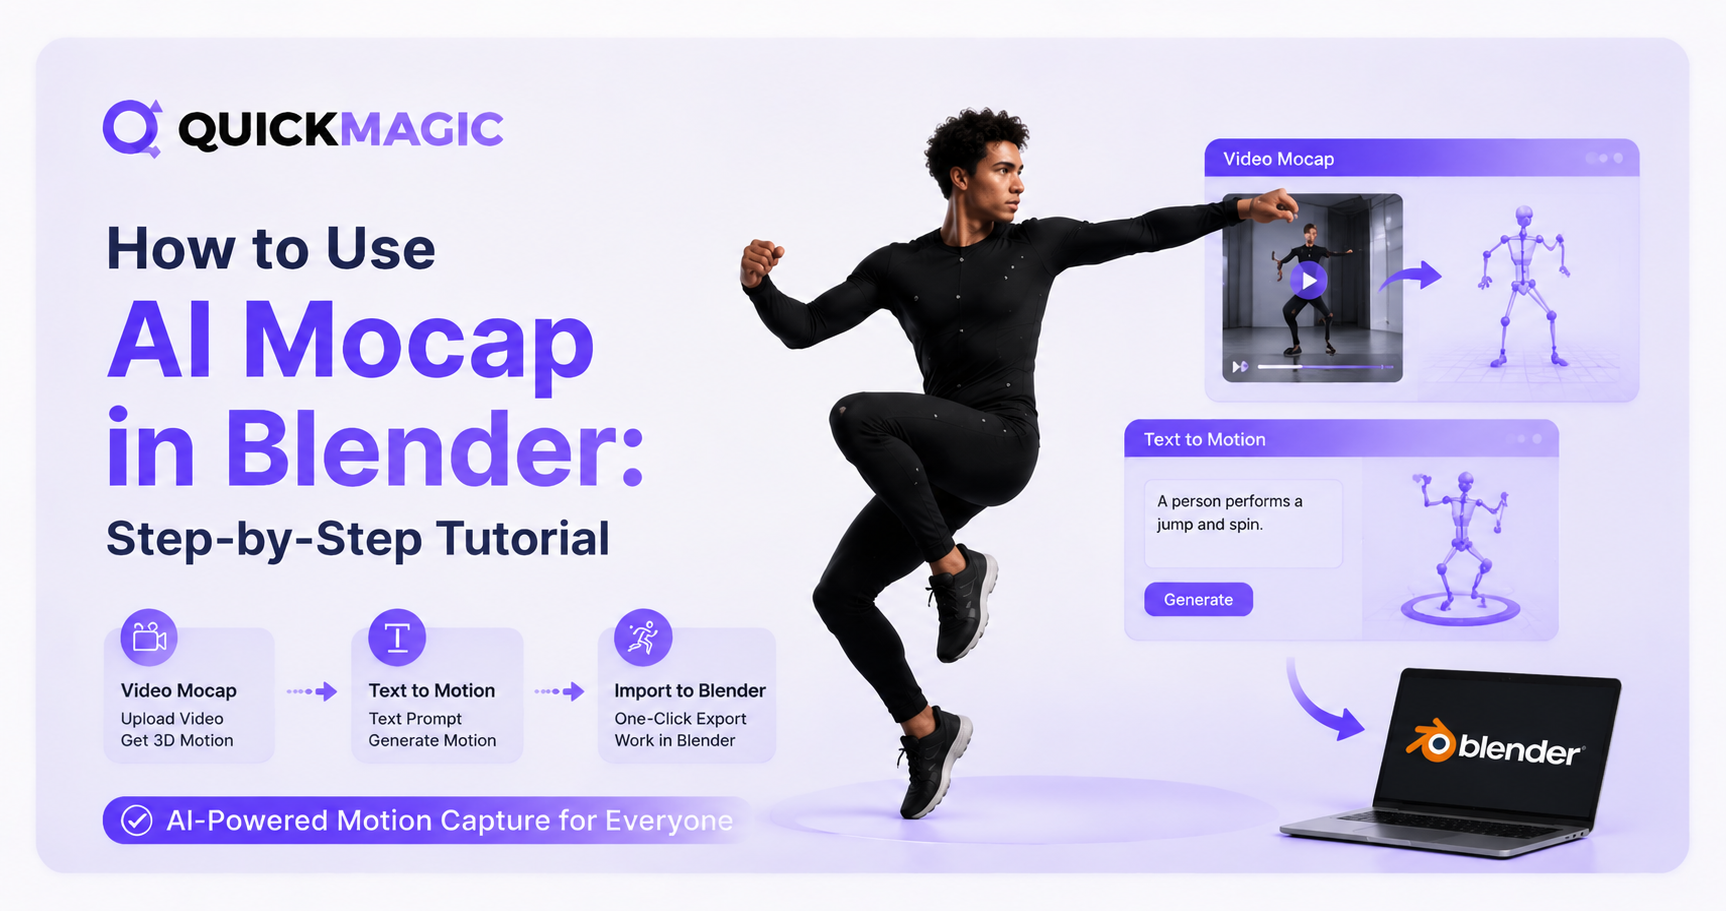
Step 1: Generate Motion with AI Mocap
AI Mocap allows you to generate 3D animation in different ways depending on your workflow.
Option 1: Video-to-Motion Capture
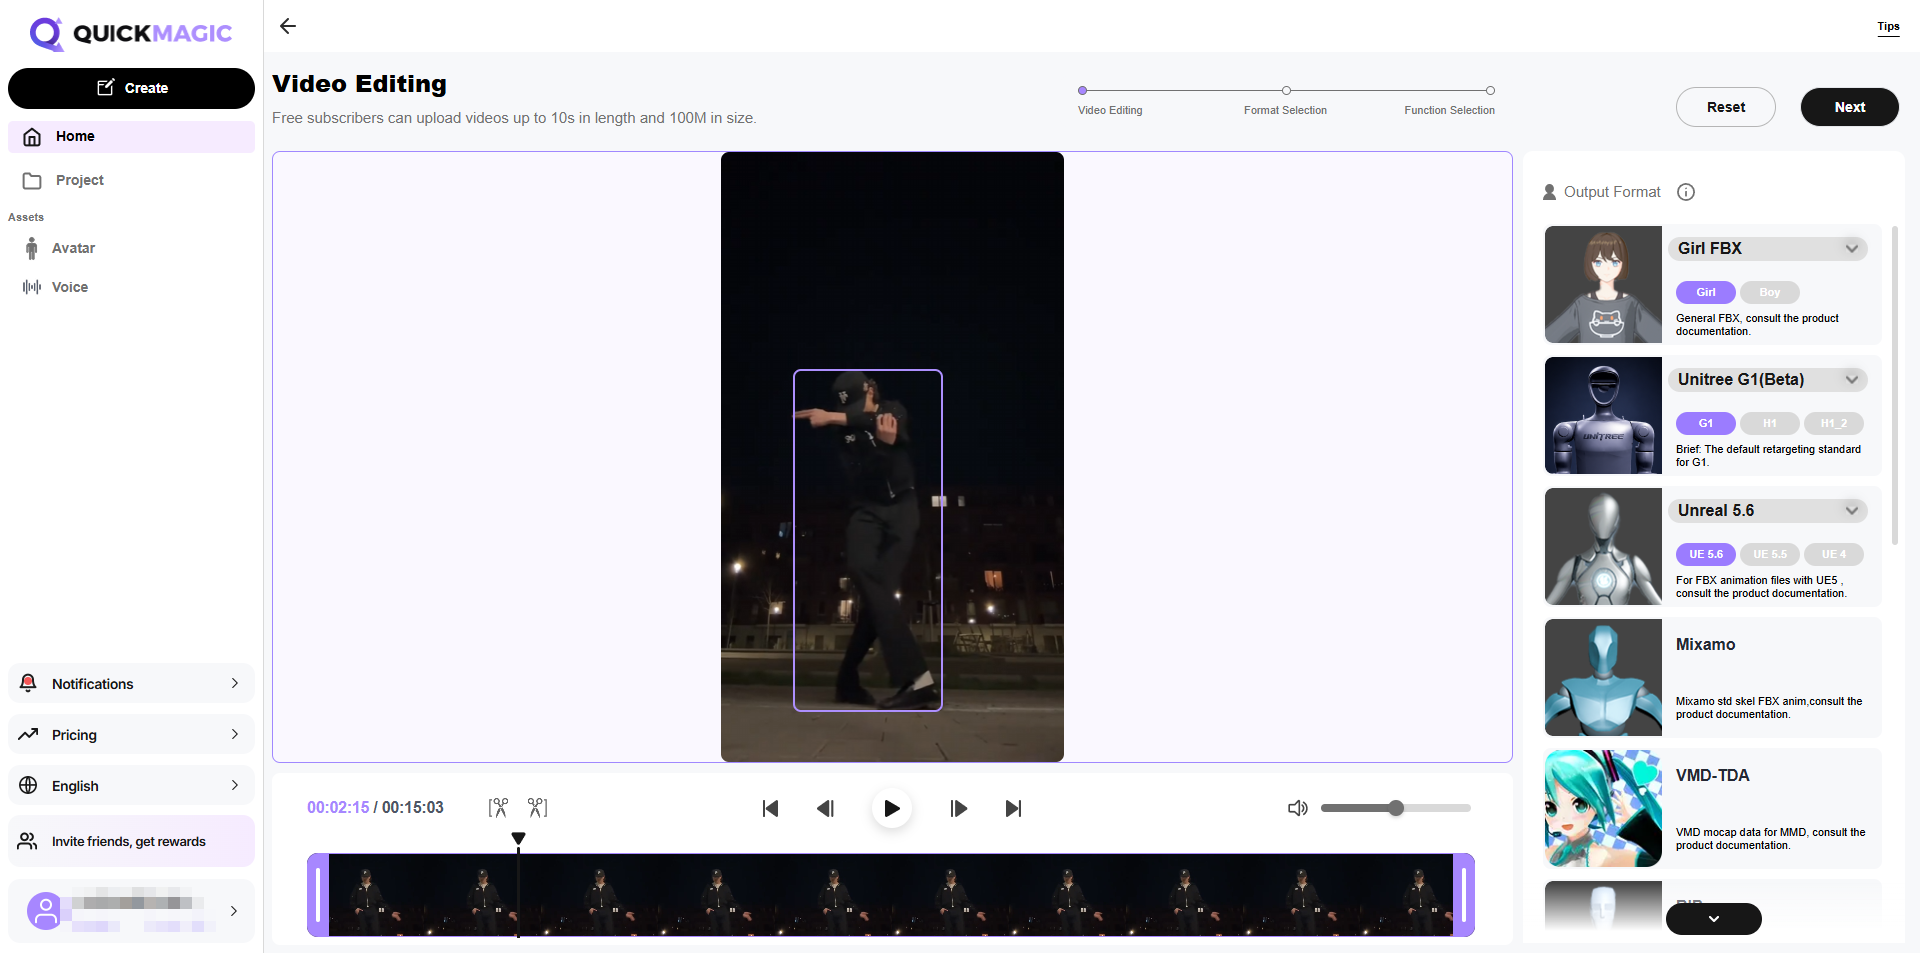
Video-to-motion uses AI to analyze movement from a reference video and convert it into animation data.
The process is simple:
1. Record a video of the desired movement.
2. Upload the video to an AI Mocap platform.
3. Let the AI analyze body movement.
4. Generate the motion data.
5. Export the animation file.
Option 2: Text-to-Motion Generation
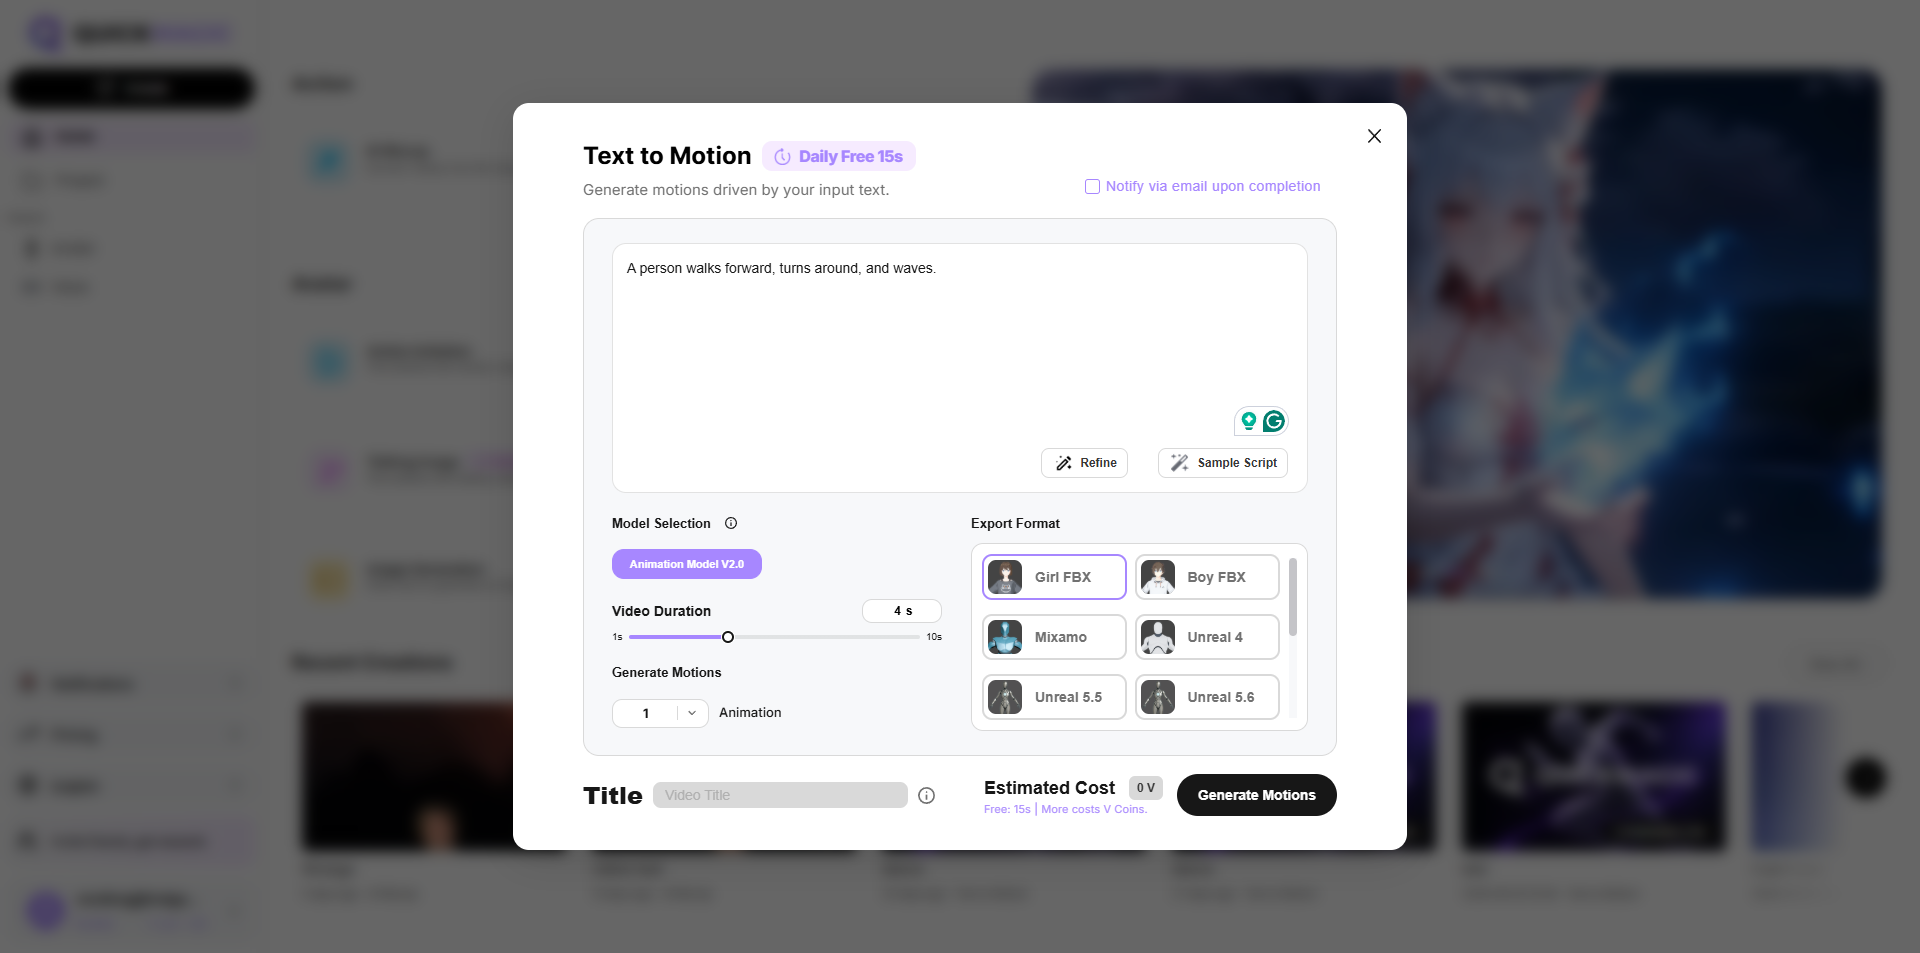
Some AI Mocap solutions also support text-to-motion generation, allowing you to create animations from simple descriptions.
For example: "A person walks forward, turns around, and waves." The AI generates a motion sequence based on your description.
Text-to-motion is especially useful for:
· Quickly testing animation ideas
· Creating game character actions
· Building animation prototypes
· Generating unique movements
After generating your animation, export the motion file in a Blender-compatible format.
Step 2: Export AI Motion Data for Blender
Once your AI motion is generated, export the animation data. Common formats supported by Blender are FBX and BVH.
Before exporting, check your settings:
· Animation frame rate
· Motion duration
· Skeleton type
· Export options
Using a compatible format ensures that Blender can correctly read the motion data.
For most 3D workflows, FBX is commonly used because it can store both skeleton information and animation data.
Step 3: Import AI Motion into Blender
After exporting your AI motion, you can bring it into Blender.
Follow these steps:
1. Open Blender.
2. Create a new project or open your existing scene.
3. Go to:
File → Import
1. Select your animation format (such as FBX or BVH).
2. Import the AI Mocap file.
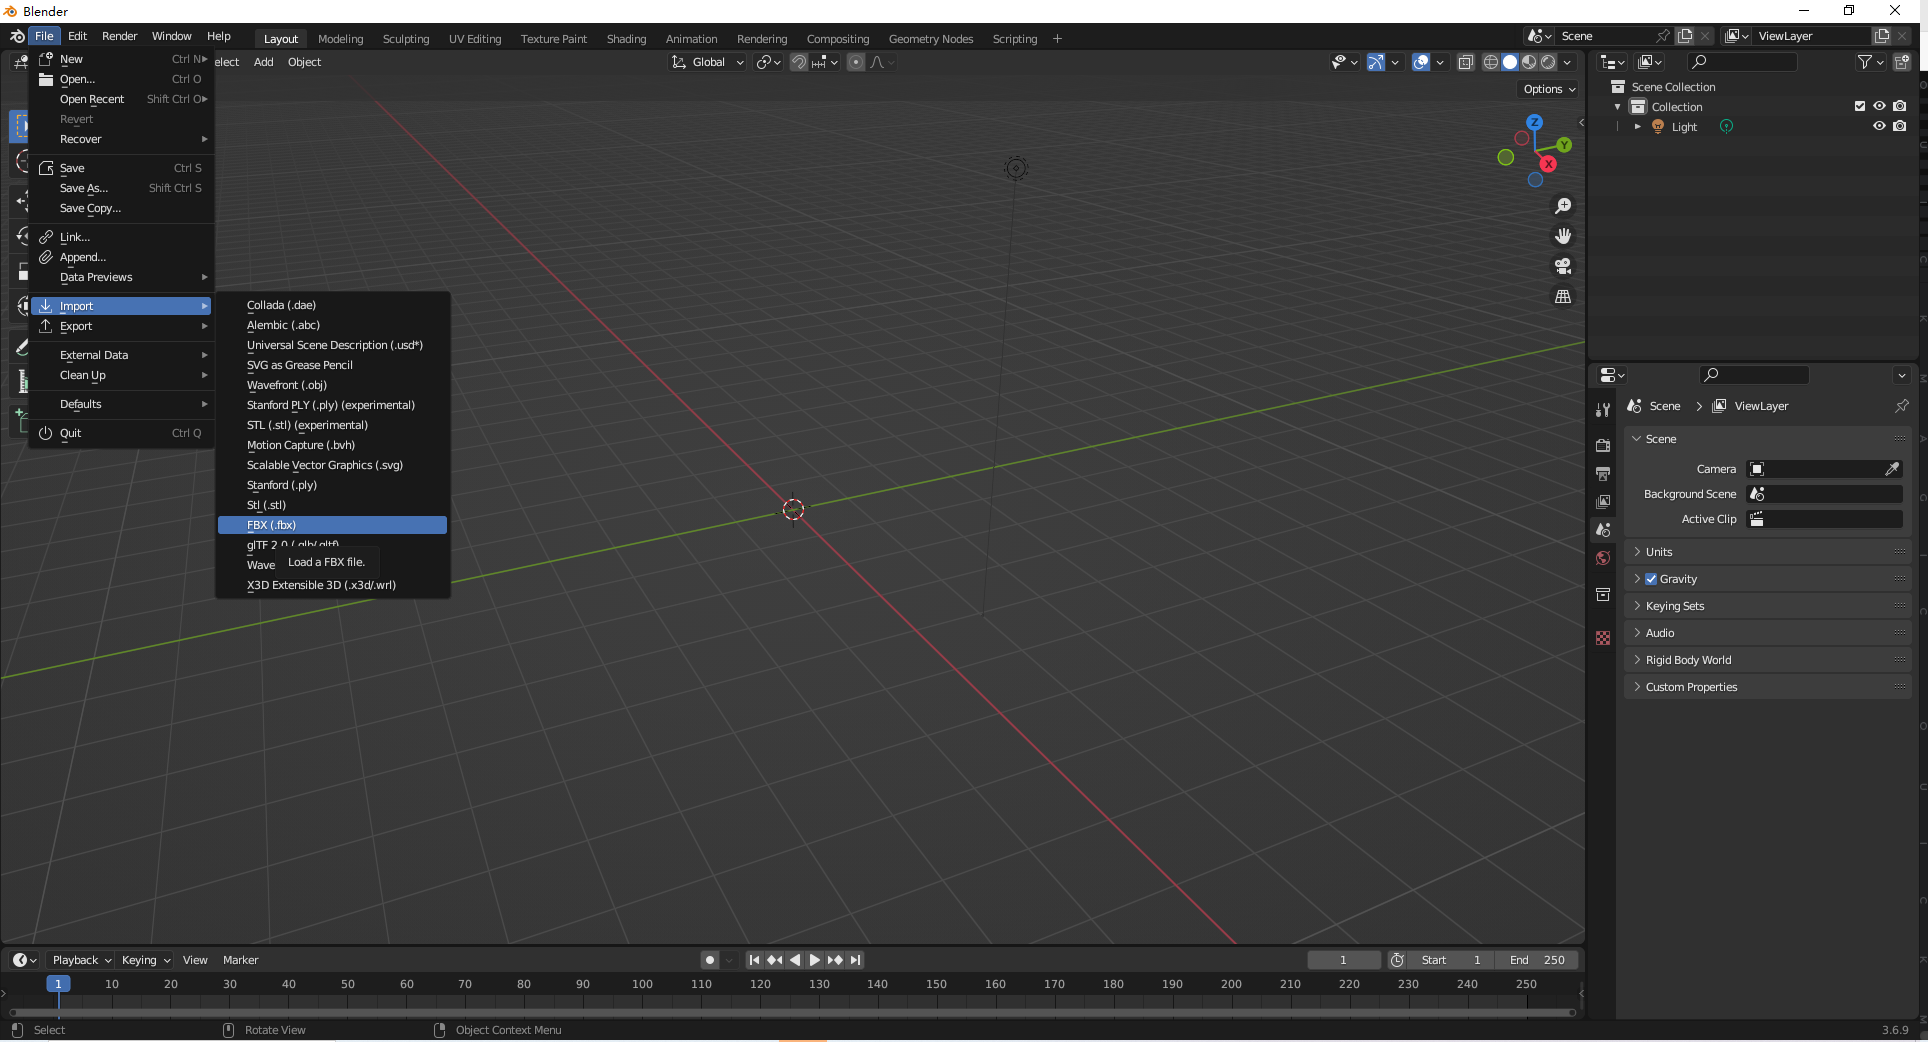
Navigate to File → Import → FBX in Blender to import your AI-generated motion data.
After importing, Blender will display the motion skeleton and animation timeline. You can press Play to preview the generated movement. At this stage, the animation is connected to the AI Mocap skeleton. To use it with your own character, the next step is motion retargeting.
Step 4: Retarget AI Motion to Your Character
To apply the animation to your own character, you need to retarget the AI motion. Motion retargeting transfers animation data from the source skeleton to your target character rig.
The general workflow is:
1. Import Your Character
Bring your rigged character into Blender and make sure the character has an animation-ready armature.
2. Match the Skeletons
Connect the AI Mocap skeleton with your character skeleton by mapping corresponding bones.
Typical mappings include:
· Hips → Hips
· Spine → Spine
· Arms → Arms
· Legs → Legs
· Feet → Feet
Correct bone mapping helps preserve natural movement.
3. Transfer the Animation
Use Blender retargeting tools or compatible animation workflows to transfer the AI motion data to your character.
After retargeting, your character should perform the same movement as the original AI-generated animation.
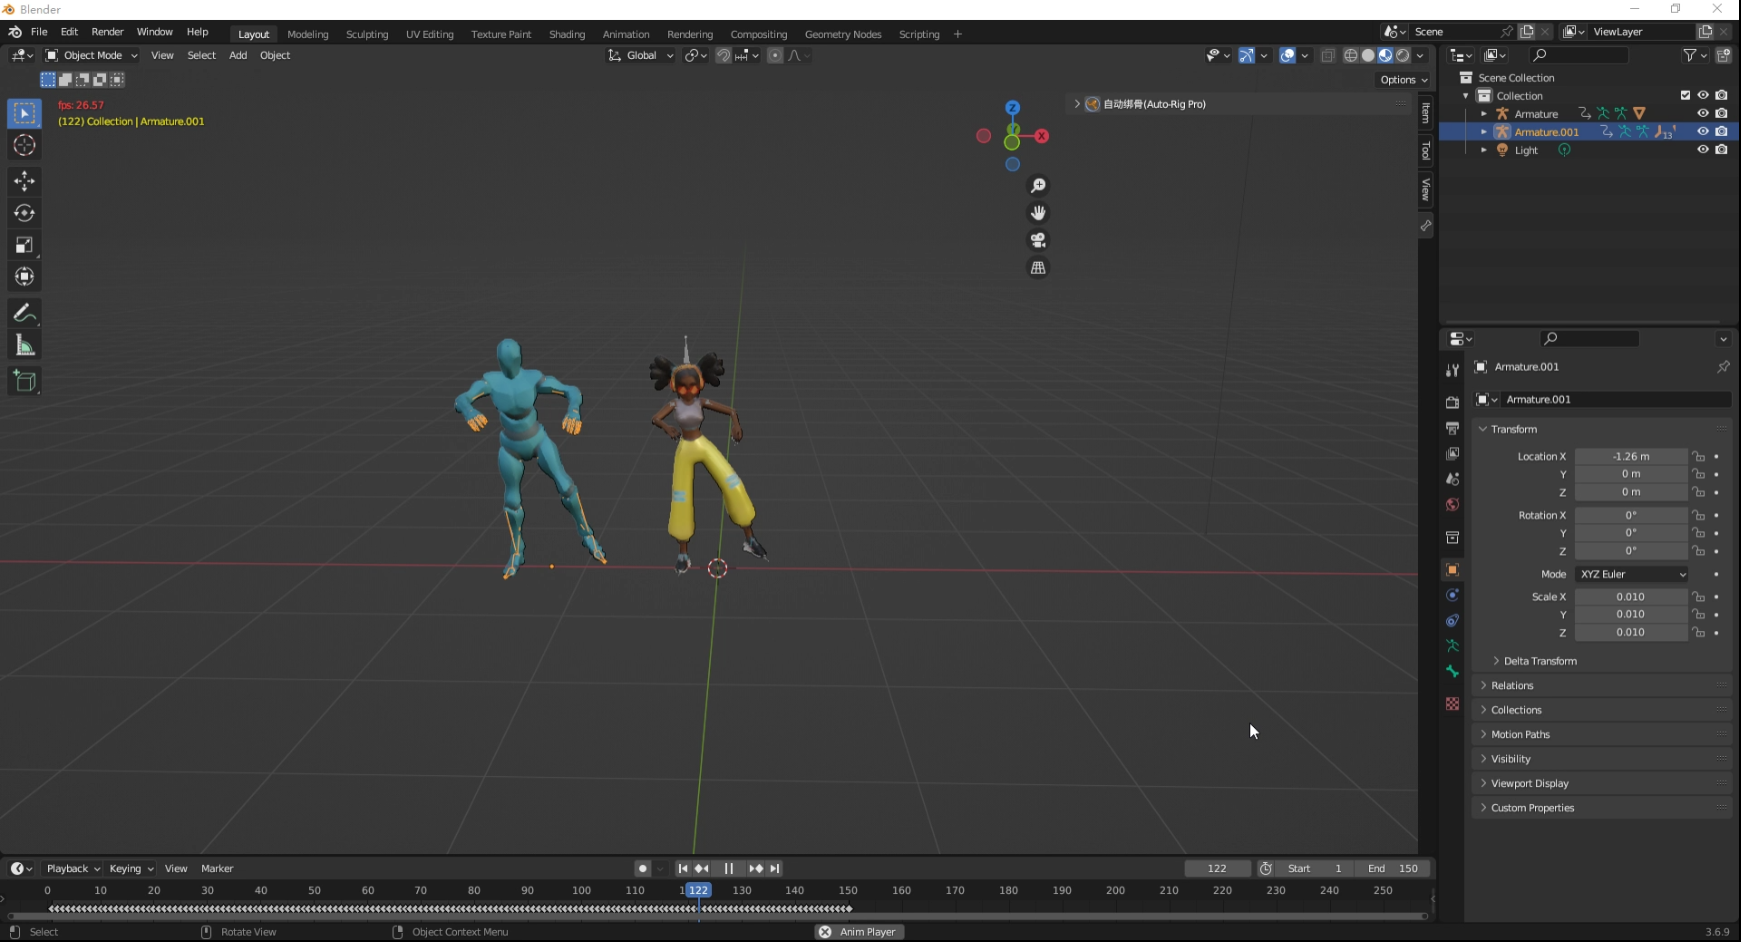
4. Bake the Animation
Once the motion looks correct, bake the animation so it becomes part of your character rig.
Step 5: Refine Your Animation in Blender
AI Mocap provides a strong animation foundation, but Blender allows you to make final adjustments and improvements.
After retargeting, you can refine your animation by:
· Adjusting animation timing
· Editing poses
· Fixing foot sliding
· Improving transitions
· Adding additional movements
For example, you can make a walking animation more dramatic, adjust the character’s style, or combine multiple motion clips into one sequence.
The advantage of using AI Mocap with Blender is that AI handles the initial motion creation, while Blender gives you full control over the final result.
Step 6: Export Your Final Animation
Once your animation is complete, you can export it for different applications. Depending on your project, you can export your Blender animation as: FBX
Commonly used for:
· Game engines
· 3D applications
· Animation pipelines
GLB/GLTF
Useful for:
· Web-based 3D experiences
· Digital content platforms
· Lightweight 3D sharing
You can also keep the Blender project file for further editing. Your AI-generated animation is now ready to use in your creative workflow.
AI Mocap + Blender Workflow Overview
The complete process can be summarized as:
Generate Motion with AI Mocap → Export Motion Data → Import Animation and Character into Blender → Retarget Motion to Your Character → Refine Animation→Export Final Result
This workflow allows creators to move from an idea to a finished animation much faster than traditional animation methods.
Why Use AI Mocap for Blender Animation?
AI Mocap makes 3D character animation more accessible by reducing the technical barriers of traditional motion capture.
With AI-powered motion generation, creators can:
· Create animations without expensive mocap equipment
· Generate motion from simple video references
· Quickly test different character actions
· Reduce manual keyframe work
Whether you are working on games, animated videos, virtual characters, or 3D content, AI Mocap can help speed up your production workflow.
Conclusion
AI Mocap is transforming the way creators produce 3D animations. By combining AI-generated motion with Blender’s powerful animation tools, artists can create realistic character movements faster and with greater flexibility.
From generating motion to retargeting it onto your own character, the entire workflow has become easier and more accessible.
If you want to create professional character animations without traditional motion capture equipment, AI Mocap combined with Blender provides an efficient and flexible solution.