Complete Workflow: Using QuickMagic AI Motion Capture with Unreal Engine 5
TL;DR: QuickMagic AI + UE5 in 7 Steps
- Step 1: Set up a well-lit recording space with any camera or smartphone.
- Step 2: Record your full-body performance video.
- Step 3: Upload to QuickMagic AI and get an FBX/BVH animation in minutes.
- Step 4: Import the animation into Unreal Engine 5 via Content Browser.
- Step 5: Retarget the animation to MetaHuman or your custom skeleton.
- Step 6: Fine-tune with the UE5 Control Rig editor.
- Step 7: Render cinematic sequences with Cine Camera and Movie Render Queue.
Key benefit: Zero hardware investment. Professional mocap quality from a single video file.
Table of Contents
- Why Use QuickMagic AI with Unreal Engine 5?
- Prerequisites & Setup
- Step 1: Set Up Your Recording Environment
- Step 2: Record Your Motion Capture Video
- Step 3: Upload to QuickMagic and Generate Animation
- Step 4: Import Animation into Unreal Engine 5
- Step 5: Retarget Animation to MetaHuman
- Step 6: Use Control Rig for Fine-Tuning
- Step 7: Render Your Cinematic Scene
- Export Format Comparison
- Pro Tips for Best Results
- Frequently Asked Questions
- Quick Start Checklist
Why Use QuickMagic AI with Unreal Engine 5?
Unreal Engine 5 is the industry-leading real-time 3D creation tool used by game developers, filmmakers, and virtual production studios worldwide. However, creating realistic character animations traditionally requires expensive motion capture studios, specialized suits with reflective markers, and multi-camera arrays costing tens of thousands of dollars.
QuickMagic AI changes this paradigm. By leveraging state-of-the-art deep learning models trained on millions of motion samples, QuickMagic AI extracts professional-grade motion capture data from any standard video recording. Pairing this with Unreal Engine 5's MetaHuman characters, Control Rig system, and cinematic rendering pipeline gives indie developers and AAA studios alike access to Hollywood-quality animation workflows at zero hardware cost.
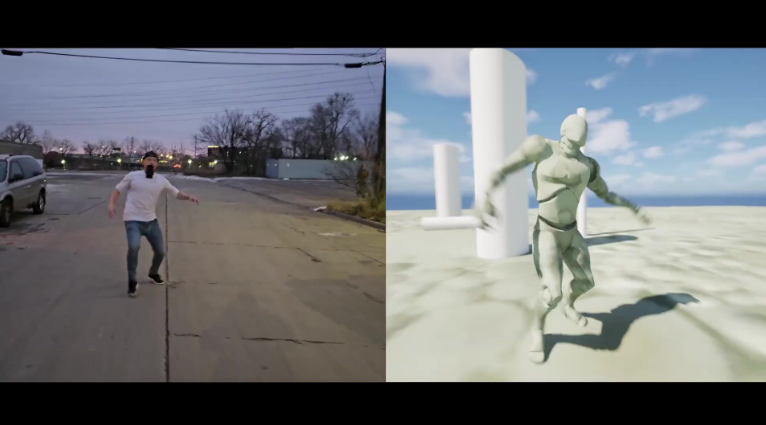
Figure 1: QuickMagic AI transforms any video into a 3D animated character ready for Unreal Engine 5.
Prerequisites & Setup
Before starting this workflow, ensure you have the following:
- A QuickMagic AI account — Sign up at quickmagic.ai. Free tier includes core motion capture features.
- Unreal Engine 5.0 or later — Download from the Epic Games Launcher.
- A recording device — Any smartphone (iPhone/Android), webcam, or DSLR camera capable of recording 720p or higher video.
- MetaHuman Plugin — Enable the MetaHuman Plugin in your UE5 project for character retargeting.
Step 1: Set Up Your Recording Environment
Set Up Your Recording Environment
A well-prepared recording environment is the foundation of high-quality motion capture. Unlike traditional marker-based systems, QuickMagic AI analyzes your entire body from video pixels, so lighting and camera positioning matter significantly.
Best Practices for Recording Setup:
- Lighting: Use even, diffused lighting from multiple angles. Avoid strong backlighting that creates silhouettes. Natural daylight from a large window works well.
- Background: Choose a clear, uncluttered background that contrasts with your clothing. A solid-colored wall or an outdoor open space is ideal.
- Camera Position: Place the camera at waist height, 3-5 meters away, capturing your full body from head to toe. A wide-angle lens helps if space is limited.
- Camera Stability: Use a tripod, smartphone mount, or any stable surface. Shaky footage reduces tracking accuracy.
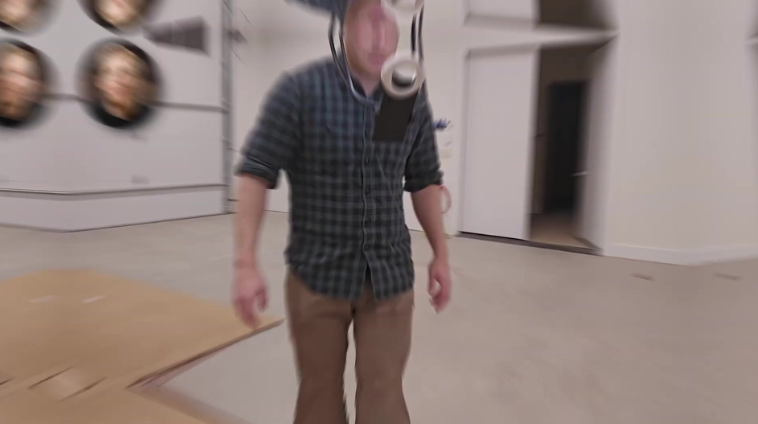
Figure 2: A DIY smartphone helmet mount enables hands-free motion capture recording for under $50.
Step 2: Record Your Motion Capture Video
Record Your Motion Capture Video
Record a video of yourself performing the movements you want to animate. QuickMagic AI processes standard MP4, MOV, and AVI files and automatically extracts motion data using computer vision pose estimation.
Recording Guidelines:
- Full body in frame: Ensure your entire body is visible throughout the recording. Cropped limbs cannot be tracked accurately.
- Face the camera: Front-facing or 45-degree angles produce the best tracking results. Pure profile views are supported but slightly less accurate.
- Minimize occlusions: Avoid having objects, furniture, or other people block your body during the recording.
- Movement clarity: Perform movements at a natural speed. Extremely fast actions may cause motion blur, which reduces tracking quality.
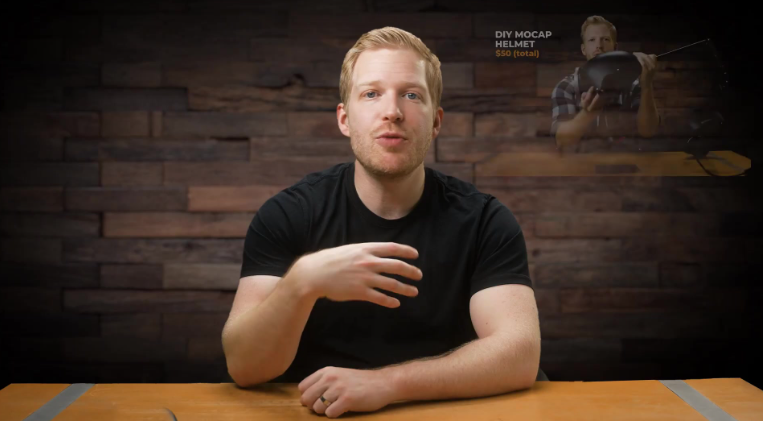
Figure 3: QuickMagic AI's DIY motion capture solution requires only a $50 helmet setup — no studio needed.
Step 3: Upload to QuickMagic and Generate Animation
Upload to QuickMagic and Generate Animation
Once your video is recorded, upload it to the QuickMagic AI platform:
- Log in to your QuickMagic AI account.
- Click "Upload Video" and select your recorded file.
- Choose your desired output format: FBX (recommended for UE5), BVH, or glTF.
- Select the skeleton preset: Humanoid (default), MetaHuman, or Custom.
- Click "Process" and wait for the AI to generate your animation. Typical processing time is 1-5 minutes depending on video length.
QuickMagic AI's neural network analyzes every frame of your video, detects 2D body joints and facial landmarks, then reconstructs 3D joint positions and rotations through inverse kinematics and physics-based optimization.
Step 4: Import Animation into Unreal Engine 5
Import Animation into Unreal Engine 5
With your animation file ready, import it into your UE5 project:
- Open Unreal Engine 5 and your target project.
- In the Content Browser, right-click in your desired folder and select Import to /Game/...
- Select the FBX file exported from QuickMagic AI.
- In the FBX Import Options dialog, verify these settings:
- Skeleton: Select your target skeleton (or create a new one if this is a fresh import).
- Animation: Ensure "Import Animations" is checked.
- Animation Length: Set to "Animated Time" to preserve the full animation duration.
- Frame Rate: Match your source video frame rate (typically 30fps).
- Click "Import All" to bring the animation into your project.
The imported animation will appear as an Animation Sequence asset in your Content Browser, ready to be applied to a Skeletal Mesh.
Step 5: Retarget Animation to MetaHuman
Retarget Animation to MetaHuman
Animation retargeting is the process of mapping motion data from one skeleton to another. UE5's built-in Animation Retargeting tool makes this straightforward for MetaHuman characters.
Retargeting Steps:
- Open the Retarget Manager from the Animation Sequence context menu.
- Select your Source Skeleton (the QuickMagic AI skeleton) and Target Skeleton (MetaHuman or your custom rig).
- Match the corresponding bones between the two skeletons. UE5 can auto-match many bones based on naming.
- Create a Retarget Pose to align the reference poses (typically T-pose or A-pose).
- Generate the Retargeted Animation and save it as a new Animation Sequence.
- Apply the retargeted animation to your MetaHuman character in the Sequencer or Blueprint.
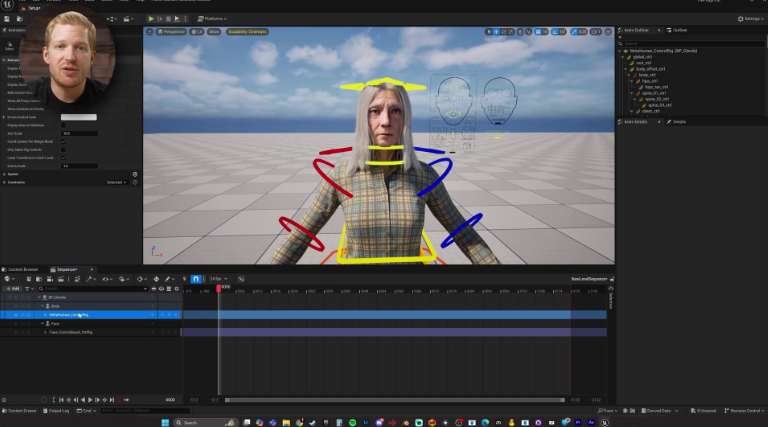
Figure 4: UE5 Control Rig showing the MetaHuman skeleton with bone structure highlighted for precise animation retargeting.
Step 6: Use Control Rig for Fine-Tuning
Use Control Rig for Fine-Tuning
While QuickMagic AI produces highly accurate motion capture, fine-tuning with UE5's Control Rig ensures your animation meets your exact creative vision.
Control Rig Workflow:
- Open your MetaHuman character in the Control Rig editor.
- Scrub through the timeline to identify frames that need adjustment.
- Use the FK (Forward Kinematics) and IK (Inverse Kinematics) controls to adjust limb positions, spine curvature, and head orientation.
- For facial animation, use the Face Control Rig to tweak expressions, eye movement, and lip sync.
- Add secondary motion such as shoulder movement, finger micro-adjustments, and body follow-through for more natural results.
- Key any corrections so they blend seamlessly with the original mocap data.
The Control Rig provides a non-destructive editing layer on top of your mocap animation, so you can always revert to the original QuickMagic data if needed.
Step 7: Render Your Cinematic Scene
Render Your Cinematic Scene
Unreal Engine 5's cinematic tools allow you to create film-quality renders of your animated character. This is where your QuickMagic mocap data truly comes to life.
Cinematic Setup:
- Place your animated MetaHuman in a level with appropriate environment (Light, Landscape, Nanite assets).
- Add a Cine Camera Actor to the scene for professional camera control.
- Configure camera settings for a cinematic look:
- Filmback: 35mm VistaVision for a widescreen cinematic frame.
- Aspect Ratio: 16:9 for standard film output.
- Focus Method: Set to "Tracking" for dynamic focus following your character.
- F-Stop: 2.8 for shallow depth of field and cinematic bokeh.
- Create camera movements using Sequencer keyframes — dolly, pan, and tracking shots.
- Set up lighting using Lumen global illumination for photorealistic bounce light.
- Use the Movie Render Queue to export high-quality frames (4K/8K, PNG/EXR) or video files.
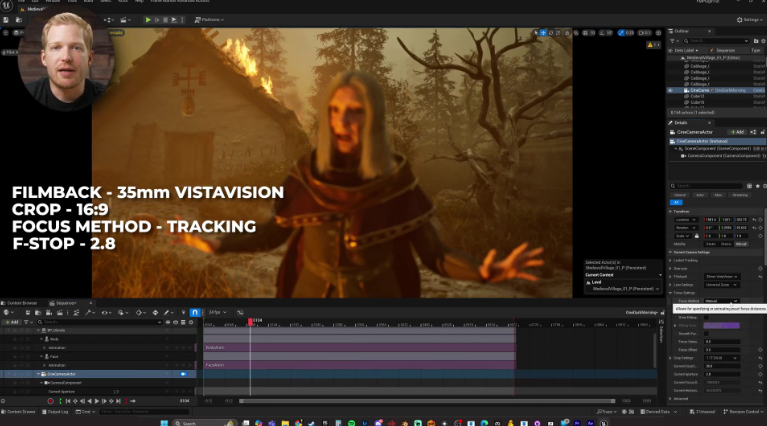
Figure 5: Cinematic rendering in UE5 with 35mm VistaVision filmback settings, producing a professional film-quality animation sequence.
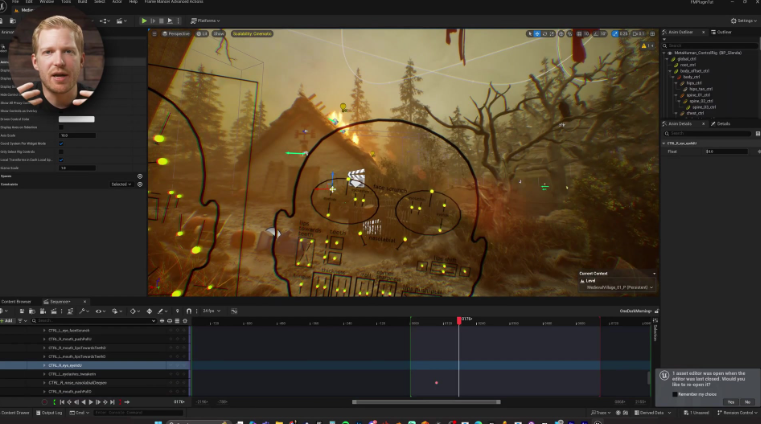
Figure 6: Full Control Rig overlay showing bone controls and the final cinematic medieval village scene in UE5.
Export Format Comparison
QuickMagic AI supports multiple export formats. Choose the one that best fits your UE5 workflow:
| Format | Best For | UE5 Compatibility | Features |
|---|---|---|---|
| FBX | Full UE5 integration | Native import | Skeleton, mesh, animation, blend shapes |
| BVH | Animation-only pipelines | Import via plugin | Joint hierarchy, rotation data |
| glTF | Web/mobile pipelines | Via glTF plugin | Full scene, PBR materials |
| Robot | Robotics/AI training | Custom import | Joint angles, quaternion data |
Pro Tips for Best Results
Video Tutorial
Full video tutorial: QuickMagic AI motion capture to Unreal Engine 5 complete workflow (12:40)
Frequently Asked Questions
Is QuickMagic AI motion capture compatible with Unreal Engine 5?
Yes, QuickMagic AI motion capture is fully compatible with Unreal Engine 5. QuickMagic exports animation data in FBX, BVH, and glTF formats, all of which are natively supported by UE5. The exported animations can be directly imported into UE5 and retargeted to MetaHuman characters or custom skeletons using the built-in Animation Retargeting system.
Do I need special hardware for QuickMagic AI motion capture?
No special hardware is required. QuickMagic AI works with any standard video recording device including smartphones, webcams, and DSLR cameras. For best results, use a well-lit environment and ensure your full body is visible in the frame. A DIY smartphone helmet mount (costing approximately $50) is an excellent affordable setup for hands-free recording.
How accurate is QuickMagic AI compared to professional motion capture systems?
QuickMagic AI delivers professional-grade motion capture accuracy using advanced deep learning models trained on millions of motion samples. While studio systems with marker suits and multi-camera arrays may offer sub-millimeter precision for specialized use cases, QuickMagic AI achieves comparable results for game animation, film pre-visualization, and virtual production at a fraction of the cost and setup time.
Can I use QuickMagic AI mocap with MetaHuman characters in UE5?
Absolutely. QuickMagic AI exports animations in FBX format that is compatible with the MetaHuman skeleton rig. After importing the animation into UE5, use the Animation Retargeting tool to map the QuickMagic skeleton to the MetaHuman Control Rig. The retargeted animation can then be applied to any MetaHuman character and further refined using the Control Rig editor for precise adjustments.
What is the typical processing time for a QuickMagic AI motion capture video?
Processing time depends on the video length and complexity of the movement. A 30-second video typically takes 1-2 minutes to process, while a 2-minute performance may take 3-5 minutes. QuickMagic AI uses GPU-accelerated deep learning inference to deliver fast turnaround times, making it ideal for iterative animation workflows in game development and film production.
Does QuickMagic AI support facial motion capture?
Yes, QuickMagic AI includes facial motion capture in addition to full-body tracking. The system detects facial landmarks including eye movement, eyebrow raises, mouth shapes, and head orientation. Facial animation data is exported alongside body animation in the FBX file, compatible with MetaHuman facial rigs in UE5.
Can I use QuickMagic AI for commercial game development?
Yes, QuickMagic AI licenses include commercial usage rights. All animations generated through the platform can be used in commercial games, films, virtual productions, and other commercial projects. Check your specific subscription tier for full licensing terms.
Quick Start Checklist
Before You Start
Recording Day
UE5 Integration
Ready to Start Your First UE5 Animation?
Get started with QuickMagic AI motion capture today. No hardware, no suits, no studio required.
Try QuickMagic AI Free