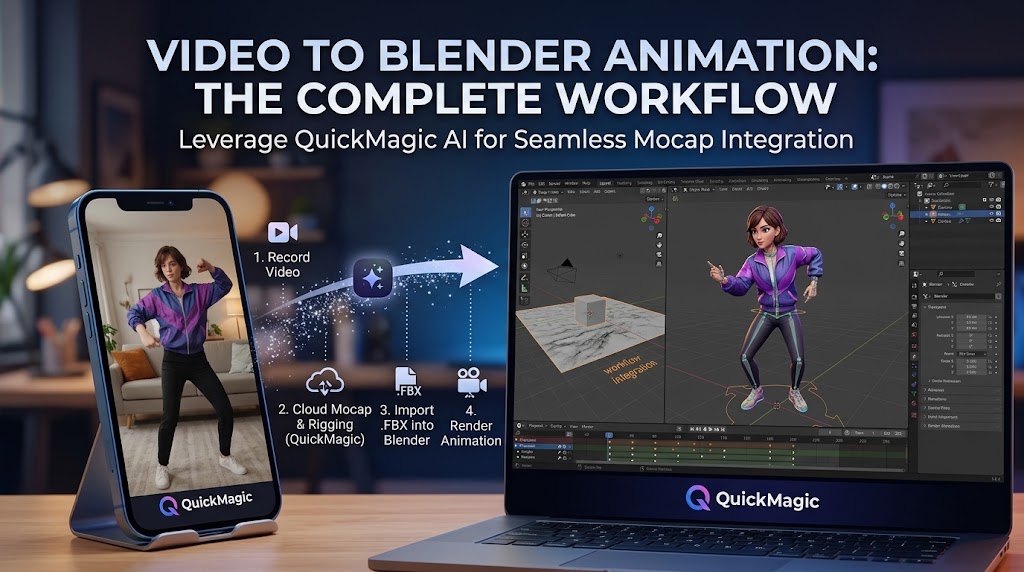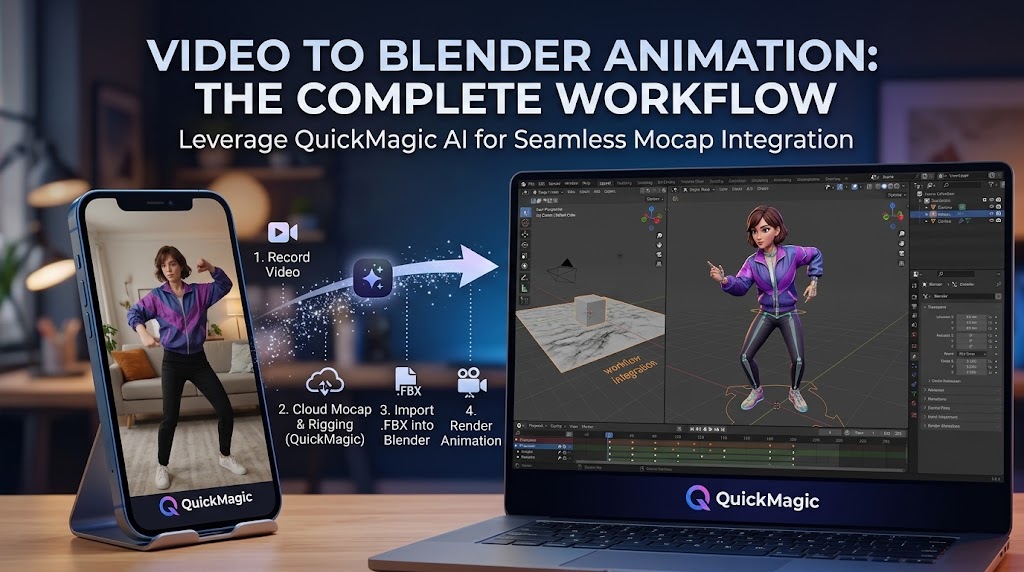
Réponse rapide : comment transformer une vidéo en animation Blender ?
Enregistrez une performance claire en pied, téléchargez la vidéo originale sur QuickMagic, générez et inspectez le mouvement IA, exportez au format FBX par défaut/Mixamo ou BVH, importez le squelette source animé dans Blender, faites correspondre les FPS de la scène, retargetez le mouvement sur le rig du personnage, bakez-le, puis corrigez le mouvement racine, les pieds, les secousses, les clipings et les contacts spécifiques au personnage.
QuickMagic convertit le mouvement du performeur en données d'animation squelettique. Blender se charge ensuite du rig du personnage, du retargeting, de l'édition, de la mise en scène, de l'éclairage et du rendu.
Le pipeline complet de la vidéo à Blender
Un fichier MP4 n'est pas directement converti en une scène Blender finie. La capture de mouvement IA reconstruit d'abord le mouvement du corps à partir des pixels et l'écrit sur un squelette animé. Cette animation source doit ensuite être mappée au rig utilisé par le personnage Blender.
Ce dont vous avez besoin
- Un téléphone, une webcam, un reflex numérique ou autre caméra.
- Un compte QuickMagic avec accès aux options de capture et d'exportation requises.
- Blender et un personnage humanoïde riggé.
- Une méthode de retargeting : Auto-Rig Pro, outils compatibles Rigify, outils Rokoko, un autre add-on, ou des contraintes manuelles.
- L'autorisation d'utiliser les séquences et l'image du performeur enregistré.
Pour un premier test, utilisez un clip de cinq à dix secondes. Validez l'ensemble du pipeline avant de filmer ou de traiter une performance plus longue.
Étape 1 : enregistrez des séquences que la capture de mouvement IA peut suivre
| Choix d'enregistrement | Point de départ recommandé | Pourquoi c'est important |
|---|---|---|
| Cadrage | Corps entier et les deux pieds visibles | Améliore le contact au sol et le suivi du bas du corps. |
| Résolution | 1080p ou plus | Préserve les détails utiles du corps et des membres. |
| Caméra | Vue stable de face ou trois-quarts | Réduit les erreurs de profondeur et de cadrage évitables. |
| Éclairage | Lumineux et uniforme | Réduit le flou de mouvement et les silhouettes faibles. |
| Vêtements | Séparation visible des membres | Aide à distinguer bras et jambes du torse/fond. |
| Durée de l'action | 5–10 secondes pour le test | Traitement rapide et dépannage facile. |
Évitez les longues périodes de membres croisés, de mains cachées, de parties du corps sortant du cadre, de personnes qui se chevauchent, de surfaces réfléchissantes et de mouvements rapides sous une faible luminosité.
Étape 2 : générez le mouvement dans QuickMagic
Téléchargez le fichier original
Utilisez l'original de la caméra plutôt qu'une copie compressée des réseaux sociaux. Sélectionnez le performeur et la plage temporelle utile là où l'interface actuelle le permet.
Choisissez la portée de la capture
Utilisez Corps entier pour l'animation générale du personnage. Sélectionnez les options haut du corps, mains ou visage uniquement lorsque le plan et le rig cible prennent en charge ces canaux.
Choisissez la pose de référence
Utilisez Pose originale pour un test simple, ou choisissez T-Pose/A-Pose lorsque la configuration de retargeting prévue l'exige.
Faites correspondre les FPS du projet
QuickMagic publie des options à 24, 30, 60 et 120 FPS dans les workflows pris en charge. Faites correspondre la fréquence d'images de la scène Blender à l'exportation au lieu d'évaluer le mouvement à un mauvais rythme.
Décidez du comportement racine
Conservez le déplacement dans l'espace monde pour une locomotion cinématographique. Utilisez le mouvement sur place lorsque la logique de jeu ou de boucle contrôlera le déplacement du personnage séparément.
Générez et inspectez
Examinez les pieds, le bassin, la hauteur du sol, les tours, les membres croisés, les mains et les articulations occluses sous plusieurs angles.
Affinez la résolution source
Si un raffinement 2D est disponible, corrigez les erreurs évidentes d'articulation et regénérez avant l'exportation. Une source propre est plus facile à réutiliser sur plusieurs personnages.
Étape 3 : choisissez FBX ou BVH pour Blender
FBX par défaut ou Mixamo
Meilleure route générale. FBX est largement pris en charge et constitue généralement le point de départ le plus simple pour Auto-Rig Pro, Rigify/rigs personnalisés, l'édition NLA et l'exportation vers des moteurs en aval. Les conseils Blender de QuickMagic recommandent le FBX par défaut pour le remappage Auto-Rig Pro, tandis que le FBX Mixamo est utile lorsque les outils cibles reconnaissent la nomenclature Mixamo.
BVH
Meilleure route légère. BVH contient la hiérarchie, les décalages et les canaux de mouvement sans maillage ni matériaux. Utilisez-le lorsque l'add-on Blender ou l'outil de retargeting personnalisé est conçu pour BVH.
| Décision | Utilisez FBX lorsque | Utilisez BVH lorsque |
|---|---|---|
| Outils de retargeting | Votre workflow attend du FBX par défaut ou Mixamo | Votre importateur/retargeteur prend fortement en charge BVH |
| Besoins en données | Vous souhaitez un échange large DCC/moteur | Vous avez seulement besoin de la hiérarchie squelettique et du mouvement |
| Utilisation future | L'animation peut aller vers Unity, Unreal, Maya ou MotionBuilder | Le mouvement reste dans l'analyse, Blender ou un pipeline de capture légère |
Étape 4 : importez l'animation QuickMagic dans Blender
Importer FBX
- Ouvrez le fichier
.blenddu personnage cible. - Choisissez Fichier → Importer → FBX (.fbx).
- Sélectionnez le FBX QuickMagic et laissez l'importation d'animation activée.
- Vérifiez dans l'Outliner l'armature source importée.
- Définissez Propriétés de sortie → Fréquence d'images pour correspondre à l'exportation QuickMagic.
- Parcourez la timeline et vérifiez que le squelette source bouge correctement avant le retargeting.
Importer BVH
- Choisissez Fichier → Importer → Motion Capture (.bvh).
- Confirmez l'échelle, les axes et la plage d'images.
- Inspectez l'orientation des articulations et le mouvement racine.
- Retargetez l'armature importée vers le rig de production.
Étape 5 : retargetez le mouvement QuickMagic vers un personnage Blender
Route A : Auto-Rig Pro
Importez le FBX par défaut QuickMagic, ouvrez le panneau Remap, sélectionnez l'armature QuickMagic comme Source et l'armature du personnage comme Cible, mappez la racine et les principaux os des membres, utilisez la mise à l'échelle proportionnelle, vérifiez la liste, appliquez les ajustements de rotation nécessaires, puis exécutez et bakez le retarget.
Route B : Rigify ou rig personnalisé
Utilisez un add-on de retargeting compatible ou des contraintes pour mapper la racine, le bassin, la colonne vertébrale, le cou, la tête, les membres, les pieds et éventuellement les doigts. Alignez d'abord les poses de repos, transférez l'animation, puis bakez-la sur les contrôles ou une action.
Liste de vérification du retargeting
- La source et la cible font face à la même direction avant.
- Les différences T-Pose/A-Pose sont corrigées avant le transfert.
- Les rôles racine et bassin sont correctement mappés.
- L'échelle du personnage et les proportions des jambes sont comprises.
- Les membres gauche/droit ne sont pas inversés.
- Les os du pied et des orteils utilisent les axes de rotation attendus.
- Les canaux des doigts et du visage ne sont mappés que lorsqu'ils sont compatibles.
Étape 6 : nettoyez l'animation dans Blender
| Problème | Vérifiez d'abord | Correction côté Blender |
|---|---|---|
| Glissement des pieds | Contacts source, échelle, foulée, FPS, déplacement racine | IK de pied temporisé, clés de pied planté, éditions de courbe |
| Secousses | Flou, occlusion, résolution source | Lissage sélectif dans l'éditeur de courbes ; évitez d'aplatir les impacts |
| Épaules/poignets tordus | Pose de repos et axes des os | Correction de pose de retarget et décalages de rotation |
| Flottement ou enfoncement | Hauteur du sol, mappage racine/bassin | Ajustement racine et passes de contact |
| Clipping du maillage | Proportions cible et poids de peau | Couches d'animation, IK, formes correctives, corrections de poids |
| Vitesse incorrecte | FPS d'exportation vs FPS Blender | Faites correspondre les FPS ou retimez intentionnellement l'action |
Conservez une action source intacte et enregistrez séparément les versions retargetées/nettoyées. L'éditeur NLA de Blender est utile pour organiser les variations, mélanger les clips et préserver les mouvements réutilisables.
Étape 7 : transformez le mouvement en un plan Blender fini
- Appliquez l'animation au personnage final et confirmez la déformation.
- Ajoutez le cadrage et le mouvement de la caméra.
- Construisez ou importez l'environnement.
- Définissez les matériaux, l'éclairage et le moteur de rendu.
- Ajoutez une animation secondaire pour les accessoires, les vêtements, les cheveux et la performance faciale.
- Synchronisez le son et ajustez le timing.
- Rendez un aperçu du viewport avant de vous engager dans la sortie finale.
La capture de mouvement IA accélère la base de l'animation du corps. Elle ne remplace pas la direction du personnage, la conception du plan, le travail de contact, le jeu d'acteur facial, l'éclairage ou la finition finale.
Regardez le workflow QuickMagic vers Blender
Le tutoriel YouTube d'UDOCGI démontre un pipeline pratique QuickMagic → Mixamo → Blender et montre pourquoi l'utilisation d'une convention de squelette reconnue par les outils en aval peut simplifier le retargeting.