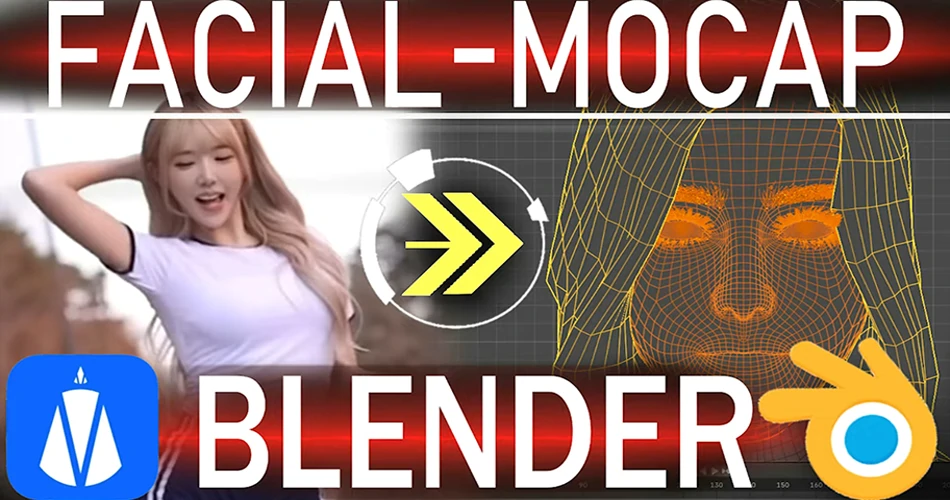
Capturing realistic facial animation no longer requires expensive motion capture studios, marker suits, or specialized depth cameras. With QuickMagic AI, you can record a facial performance on any smartphone and convert it into blendshape-based animation data — ready for Blender, Maya, Unreal Engine, or any 3D software that supports FBX.
This guide walks through two complete Blender workflows for taking that facial capture data and applying it to a 3D character. Method One uses Blender's built-in shape key driver system (free). Method Two uses the Human Generator plugin (paid) for a faster, automated character pipeline. Both methods also work with OnlyFace — QuickMagic's dedicated facial capture feature.
What Is Facial Motion Capture From Video?
Facial motion capture (or "face mocap") is the process of recording human facial expressions and translating them into digital animation data. Traditional facial mocap requires optical marker systems (like Vicon) or depth-sensing cameras (like iPhone TrueDepth). These systems are accurate but expensive and often studio-bound.
Video-based facial mocap — also called markerless facial capture — uses AI computer vision to analyze a standard RGB video and extract facial movement data. QuickMagic AI uses deep learning models trained on facial landmark detection and blendshape estimation to produce animation-ready data from any phone camera recording.
The output is an FBX file containing blendshape (shape key) animation, where each frame encodes coefficients for facial muscle movements like eyebrow raise, lip corner pull, jaw open, and cheek puff. This data maps directly to standard ARKit-compatible 52-blendshape rigs, as well as custom character rigs in Blender, Maya, and Unreal Engine.
Why Phone-Based Facial Mocap?
If you have a smartphone, you already have everything needed for professional-quality facial animation. Here's why phone-based mocap is transforming indie animation, game development, and content creation:

Workflow Overview
Both methods share the same first three steps — the capture and processing stage. They diverge when it comes to applying the facial data to a 3D character in Blender:

What You'll Need
- Smartphone — iPhone (2018 or later) or Android with decent camera. Front camera works well for close-up facial capture.
- QuickMagic AI account — Free tier available at quickmagic.ai
- Blender 3.6 or later — Free download
- Human Generator plugin — Only for Method Two. Available at superhivemarket.com (paid, one-time purchase)
- Good lighting — Even, diffuse lighting on the face. Avoid harsh shadows or backlight.
Step 1–3: Capture and Export Facial Data
These three steps are shared by both methods. Complete them before choosing your Blender integration approach.
1Record Your Facial Performance
- Position your phone at eye level, 60cm–1m away from your face
- Use the front camera for easier framing, or the rear camera for higher quality
- Ensure your face is well-lit with diffuse, even lighting — avoid strong directional shadows
- Look directly at the camera and perform your facial expressions naturally
- Record for 10–30 seconds of performance (QuickMagic processes up to 60s on free tier)
- Keep your head relatively still — excessive head movement reduces tracking accuracy

2Upload to QuickMagic AI
- Go to quickmagic.ai and sign in to your account
- Create a new project and select Facial Capture mode
- Upload your recorded video file (MP4, MOV, or AVI supported)
- QuickMagic's AI engine automatically detects facial landmarks and computes blendshape coefficients for each frame
- Processing typically takes 1–3 minutes depending on video length
3Download Facial Animation Data
- Once processing is complete, preview the facial animation in the QuickMagic web viewer
- Click Export and select FBX format
- The downloaded file contains blendshape animation data compatible with Blender, Maya, UE5, Unity, iClone, and 3ds Max
- Save the file in an accessible location for Blender import

Method One: Blender Shape Key Redirection (Free)
Method One uses Blender's built-in shape key (blendshape) driver system to transfer facial animation from the QuickMagic source mesh to your custom character. This method is completely free and works with any character that has shape keys — whether you sculpted the face yourself, used a free rig from Mixamo, or imported from another 3D tool.
Original creator's YouTube source: https://www.youtube.com/watch?v=46iAc_cjeBs
4Import FBX into Blender
- Open Blender and create a new General scene
- Go to File → Import → FBX (.fbx)
- Select the QuickMagic FBX file you downloaded
- In the import settings, enable Animation → Import and set Bone/Shape Key to import shape keys
- You'll see the QuickMagic source face mesh with animated shape keys in the viewport
5Identify Source Shape Keys
- Select the imported face mesh, go to Object Data Properties tab (green triangle icon)
- Expand the Shape Keys panel — you'll see a list of facial blendshapes (e.g.,
browInnerUp,eyeBlinkLeft,mouthSmileLeft,jawOpen) - These follow the ARKit 52-blendshape standard, which is the most widely supported facial animation format
- Note the exact names — you'll need them for the driver mapping
6Load Your Target Character
- Import your custom character mesh into the same Blender scene
- Ensure your character has shape keys (blendshapes) for at least the basic expressions: jaw open, mouth smile, eye blink, brow raise
- If your character uses bone-based facial rigging instead of shape keys, you'll need to add shape key drivers that map blendshape values to bone rotations
7Create Shape Key Drivers
The core of this method is creating driver constraints that link the source shape key values to your target character's shape keys:
- Go to your target character's Shape Keys panel
- Select the target shape key (e.g., your character's
Jaw_Open) - Right-click the Value slider → Add Driver
- In the driver editor, set the variable type to Shape Key (or Single Property)
- Point it to the source mesh's corresponding shape key (e.g.,
jawOpen) - Set the mapping function (usually linear:
var) or adjust the curve for custom response - Repeat for each facial shape key you want to transfer
8Test and Refine
- Scrub the timeline to verify facial animation is transferring correctly to your character
- Check key expressions: blink, smile, jaw open, brow raise
- Use Blender's Graph Editor to fine-tune driver curves if certain expressions feel too subtle or too extreme
- Add modifier curves (e.g., clamp, multiplier) if your character's shape key ranges differ from the source

Method Two: Human Generator Plugin Workflow (Paid)
Method Two uses the Human Generator (HumGen3D) plugin for Blender, which automatically creates fully rigged 3D characters with shape key-based facial rigs. This eliminates the manual driver mapping from Method One — the plugin generates a character whose facial rig is pre-configured to accept ARKit blendshape data.
Original creator's YouTube source: https://www.youtube.com/watch?v=9NBIk_CsZF8
Plugin Details
- Plugin Name: Human Generator (HumGen3D)
- Purchase: superhivemarket.com/products/humgen3d
- Type: Blender add-on (paid, one-time purchase)
- Compatibility: Blender 3.6+ (check current version support before purchase)
4Install Human Generator Plugin
- Download the plugin .zip file from the Superhive Market link above
- In Blender: Edit → Preferences → Add-ons → Install
- Select the downloaded .zip file and enable the add-on
- The Human Generator panel will appear in the N-panel (press
Nin the viewport)
5Generate a Rigged Character
- Open the Human Generator panel in the N-sidebar
- Customize your character: gender, body type, ethnicity, hair, clothing, skin tone
- Click Generate — HumGen creates a fully rigged character with a complete facial shape key system
- The generated character includes 52+ ARKit-compatible shape keys, ready to receive facial animation data
6Import QuickMagic FBX and Transfer Animation
- Import the QuickMagic FBX file into the same Blender scene (File → Import → FBX)
- Select the source face mesh from QuickMagic
- Use the Human Generator panel's Shape Key Transfer or Blender's native driver system to link source blendshapes to the HumGen character's shape keys
- Since HumGen characters use ARKit-standard naming, most shape keys will auto-match by name
- Verify the animation by scrubbing the timeline — the generated character's face should now animate with your recorded performance
7Customize and Export
- Fine-tune individual shape key values if certain expressions feel off
- Apply additional modifiers: skin shaders, hair physics, eye tracking
- Export the final character with animation as FBX for use in game engines, or render directly in Blender with Cycles or Eevee

OnlyFace Integration
OnlyFace is QuickMagic's dedicated facial capture feature, designed specifically for extracting high-fidelity facial animation from video. While the general QuickMagic capture pipeline handles both body and face, OnlyFace focuses exclusively on facial data extraction, producing more detailed blendshape coefficients for nuanced expressions.
The redirection methods described above — both Method One (shape key drivers) and Method Two (Human Generator) — work identically with OnlyFace capture data. Simply:
- Select OnlyFace mode when uploading to QuickMagic
- Download the FBX output as usual
- Follow the same Blender import and redirection steps from Method One or Method Two
OnlyFace data typically contains more granular blendshape values for micro-expressions (subtle lip tremors, eye darts, cheek micro-movements), making it especially valuable for:
- Game cinematics and cutscenes requiring high emotional fidelity
- VTuber and avatar streaming applications
- Medical and psychological animation studies
- High-end short film and VFX character animation
Method Comparison: Which Should You Choose?

Best Practices for Phone Facial Capture
Lighting Setup
- Use diffuse, even lighting — a ring light or natural window light works well
- Avoid strong directional shadows that obscure part of the face
- Ensure both sides of the face are equally lit for symmetric blendshape tracking
- If recording outdoors, avoid direct sunlight — overcast conditions are ideal
Camera Position and Angle
- Camera at eye level, facing directly forward
- Maintain 60cm–1m distance — too close causes lens distortion, too far reduces facial detail
- Frame the face to fill roughly 60–70% of the frame
- Use portrait/vertical orientation for tighter facial framing
Performance Tips
- Start with a neutral expression for 2 seconds — gives the AI a baseline reference
- Exaggerate expressions slightly more than natural — subtle micro-movements may not track well
- Avoid rapid head movement — keep the head relatively still and let the face do the work
- Remove glasses, hats, or face-covering accessories that occlude facial features
- If wearing glasses is necessary, ensure they don't create strong reflections on the lenses
Video Quality
- Record at 1080p or higher resolution
- Use 30fps or 60fps — higher frame rates produce smoother animation
- Stabilize the phone on a tripod or stand — handheld recording introduces shake that can confuse tracking
- Record in MP4 or MOV format for fastest QuickMagic processing
Troubleshooting Common Issues

FAQ
Can I do facial motion capture with just my phone?
Yes. QuickMagic AI processes facial video from any smartphone camera — no depth sensors, infrared cameras, or specialized hardware required. Simply record your facial performance with your phone's front or rear camera, upload to QuickMagic, and download the facial animation data as an FBX file.
Is QuickMagic facial motion capture free?
QuickMagic offers a free tier that includes facial motion capture processing. You can record, upload, and download facial animation data at no cost. Premium tiers provide higher resolution processing, longer video support, and batch processing for commercial pipelines.
What is the difference between Method One and Method Two?
Method One uses Blender's built-in shape key driver system to redirect QuickMagic facial data to any custom character — it's free but requires manual blendshape mapping. Method Two uses the Human Generator plugin (paid, from superhivemarket.com) to generate a fully rigged 3D character and apply facial animation directly — it's faster but costs money.
What is OnlyFace and how does it relate to QuickMagic?
OnlyFace is QuickMagic's dedicated facial capture feature. It specializes in extracting detailed facial animation data — including blendshape coefficients for eyebrows, eyes, cheeks, and mouth — from standard video. The same redirection methods described in this guide apply to OnlyFace capture data.
Which software supports QuickMagic facial capture data?
QuickMagic exports facial animation as FBX files compatible with Blender, Maya, 3ds Max, Unreal Engine 5, Unity, Cinema 4D, and iClone. The blendshape-based animation works with any 3D software that supports FBX import and shape key / morph target systems.
Quality Checklist
Before publishing or rendering your facial animation, verify the following:
- Source video has good, even lighting with no harsh shadows on the face
- Camera is at eye level, 60cm–1m from the subject
- Face fills 60–70% of the video frame
- Subject starts with a 2-second neutral expression
- Head movement during recording was minimal
- QuickMagic processing completed without errors
- FBX file was imported with animation and shape keys enabled
- All major shape keys are mapped (jaw open, smile, blink, brow raise minimum)
- Timeline scrub test shows correct facial animation on target character
- No left/right swap issues on asymmetric expressions
- Animation curves are smooth (no jitter from poor tracking frames)
- Final render or export includes all required facial expressions