


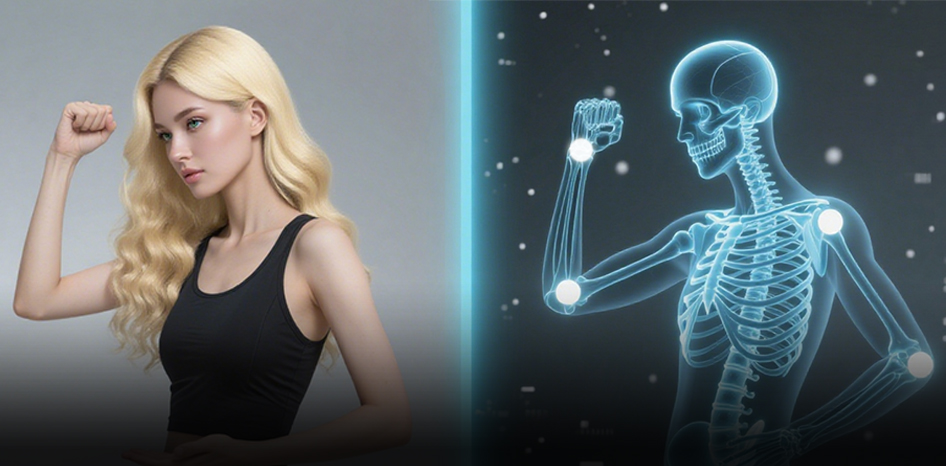
Upper Body · Torso · Head · Arms · Animation Layers
Half-Body AI Motion Capture: QuickMagic Upper-Body Algorithm Guide
Record accurate waist-up performances, use full-body video when convenient, select the correct first-frame pose and model, fix torso lean and head-rotation errors, retarget the result and combine it with lower-body locomotion in Blender, Maya, Unreal Engine or Unity.
What the algorithm update changed
Original before-and-after result
Half-body capture and export tutorials
QuickMagic Full Body, Half Body and Face Tracking in Blender
Compares full-body, half-body and facial tracking inside a practical Blender workflow.
Open on YouTubeQuickMagic AI MoCap Tutorial — Blender, Unity and Mixamo
Demonstrates QuickMagic capture and downstream use in Blender, Unity and Mixamo.
Open on YouTubeChoose the correct capture scope
| Scope | Use it for | Do not expect |
|---|---|---|
| Full Body | Walking, running, kicks, jumps, floorwork, foot contacts and root travel | Close facial detail from a distant wide shot |
| Upper Body | Dialogue, gestures, presenters, seated acting, aiming, carrying and upper-body layers | Reliable lower-body locomotion or foot planting from a waist-up crop |
| Face / Hands | Dedicated facial performance, finger motion or close interaction | Whole-body balance and root trajectory |
Best applications for half-body AI mocap
- Talking avatars and digital presenters
- Dialogue scenes and cinematic acting
- VTuber and livestream gesture libraries
- Seated desk, podcast and interview animation
- Weapon aim, reload, carry and interaction layers
- Character emotes used over idle, walk or run cycles
- Social video and virtual influencer production
- Animation blocking when lower-body motion is supplied separately
1Record a trackable upper-body performance
- Frame from the hips or waist to above the head.
- Keep both hands inside the frame during every gesture.
- Leave more horizontal margin than a conventional talking-head crop.
- Use a stable camera at roughly eye or chest height as a starting point.
- Use even lighting and enough shutter speed to keep hands and head sharp.
- Begin with one or two seconds of a neutral, readable pose.
- Avoid long hand-to-face occlusion and repeated arm crossing.
- Upload the original camera file rather than a messaging-app recompression.
30 FPS or 60 FPS?
Use 30 FPS for most dialogue and controlled gestures. Use 60 FPS for rapid hand or weapon motion only when the source is bright enough to remain sharp and the active plan and destination support the intended output.
2Select the QuickMagic settings
- Upload the source and choose the intended subject.
- Select Upper Body or the current equivalent capture-scope label.
- Choose a first-frame pose compatible with the target workflow.
- Use V1.0 for standard dialogue and gesture motion.
- Test V2.0 Beta only when the performance contains strong leaning, unusual dynamics or brief occlusion.
- Start Physics Optimization at a low value so the gesture amplitude is preserved.
- Select the target skeleton/export preset and frame rate.
- Use in-place/root settings deliberately; upper-body layers usually do not need global travel.
3Review and correct the generated motion
Inspect the preview at normal speed and frame by frame:
- Does the chest lean match the performer rather than the arm swing?
- Does the head look up, down and rotate without snapping?
- Do the shoulders stay level when they should?
- Do elbows and wrists remain on the correct side?
- Do crossed hands retain their identities?
- Does a full-body source produce stable upper-body output?
Use 2D Refinement on supported paid plans when the underlying visible keypoints are wrong. Correct source observations before trying to hide the issue with broad curve smoothing.
4Retarget to the production character
- Import the QuickMagic source with the correct frame rate and orientation.
- Match source and target T-pose or A-pose.
- Map pelvis/root, spine, chest, neck, head, clavicles, arms and hands.
- Decide whether the pelvis should come from the upper-body clip or the base locomotion.
- Validate shoulder width and arm-length differences.
- Correct wrist/prop contacts on the final target.
- Bake only after the source and layered result are approved.
Combine upper-body mocap with lower-body locomotion
| Software | Recommended layering method | Typical use |
|---|---|---|
| Unreal Engine | Layered Blend Per Bone, Blend Mask or Upper Body Slot | Reload, aim, gesture or dialogue over gameplay locomotion |
| Unity | Avatar Mask with Animator layer or Timeline override | Carry, wave, celebrate or interact while walking |
| Maya | Animation Layers or Time Editor clip layers | Blend and key corrections without overwriting the base motion |
| Blender | NLA tracks plus rig-specific bone/channel control | Sequence actions and create upper-body-over-locomotion composites |
Choose the layer boundary
A chest-only layer preserves more lower-body balance from locomotion. A pelvis-up layer captures more acting and body lean but can conflict with the walk cycle. Test both and blend around the lower spine.
Common upper-body capture problems
| Problem | Likely cause | Recommended fix |
|---|---|---|
| False forward/backward lean | Arm–torso coupling, crop or unclear hips | Include hips/waist, reduce occlusion and use the updated upper-body mode |
| Head tilts or snaps upward | Face blur, hair/hand occlusion or extreme angle | Improve lighting, keep the face visible and correct the source keypoint |
| Wide arm motion warps the chest | Shoulder ambiguity or arms crossing the torso | Use contrast, three-quarter view and wider hand spacing |
| Hands leave the frame | Portrait-style crop is too tight | Add horizontal safety margin or record a wider take |
| Shoulders rise after retargeting | T/A-pose or clavicle mapping mismatch | Correct the retarget pose and shoulder chains |
| Upper-body layer twists the pelvis | Layer starts too low or includes unwanted root curves | Mask the pelvis/root or move the blend boundary to the spine |
| Walking animation disappears | Upper-body clip overrides the entire skeleton | Use a per-bone mask, Avatar Mask or upper-body slot |
| Face or fingers lack detail | Insufficient pixels or dedicated capture mode | Record a closer face/hand take and combine the results |
Production checklist
- The lower body is intentionally excluded, not accidentally cropped.
- Hips/waist, torso, head and both hands remain visible.
- The widest gesture fits inside a horizontal safety margin.
- Motion blur is low enough for fast hands and head turns.
- Upper Body mode is selected independently from V1/V2 base model.
- The first-frame pose matches the target workflow.
- Torso lean, head tilt and arm-driven distortion are inspected.
- Visible source errors are corrected before export.
- The target retarget pose and spine/arm chains are validated.
- A per-bone or Avatar Mask preserves the lower-body animation.
- The final composite is checked for shoulder, pelvis and hand-contact seams.
Original article cover
Frequently asked questions
What is half-body AI motion capture?
It focuses on torso, spine, head, shoulders, arms and hands. It is useful when lower-body locomotion is unnecessary or comes from a separate animation.
Can upper-body mode process a full-body video?
Yes. QuickMagic's V1.3.4 changelog documents a fix that enables upper-body capture to process full-body video inputs.
Is Upper Body the same as V2.0?
No. Upper Body is a capture scope; V2.0 Beta is a complex-motion base model.
How should I frame the performer?
Include the hips or waist, torso, head and both hands, with extra horizontal space for the widest gesture.
Why does arm movement distort the torso?
Overlap, shoulder ambiguity and earlier reconstruction behavior can couple the arm trajectory to chest rotation. Use the updated mode, clearer framing and source correction.
Can I combine upper-body mocap with walking?
Yes. Use a per-bone or Avatar Mask so the upper-body clip affects only the selected spine, head and arm chains.
Does half-body capture include face and fingers?
QuickMagic offers hand and facial workflows, but detail depends on source pixels and visibility. Dedicated close captures are usually better for high-detail face or fingers.
When should I choose Full Body?
Use Full Body for locomotion, foot contact, kicks, jumps, floorwork, root motion and whole-body balance.
Related QuickMagic guides
Test one short gesture before processing the complete performance
Record neutral pose, head turn, look up, wide arm gesture, crossed hands and torso lean. Validate those difficult moments in QuickMagic and on the final rig before processing the complete dialogue or gesture library.
Official and primary references
- QuickMagic: Original half-body algorithm update
- QuickMagic: V1.3.4 upper-body compatibility, head rotation and pose updates
- QuickMagic: Current plan limits and 2D Refinement
- Epic Games: Layered Blend Per Bone upper-body animation
- Epic Games: Upper Body Animation Slots
- Unity: Upper-body override with Avatar Mask
- Blender: Nonlinear Animation Editor
- Autodesk Maya: Animation Layers
- QuickMagic Full Body, Half Body and Face Tracking in Blender
- QuickMagic AI MoCap Tutorial — Blender, Unity and Mixamo




