


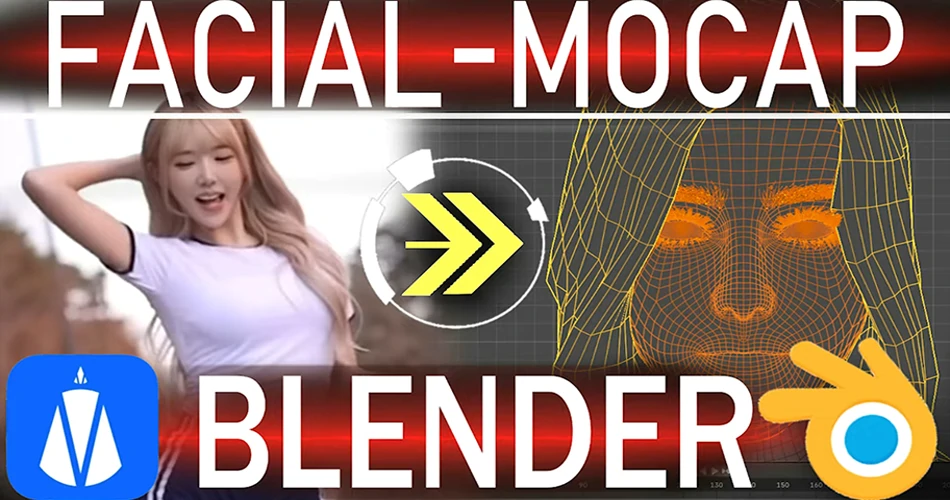
Phone Video → Facial Blendshapes → Blender
Facial Motion Capture from Video: QuickMagic Phone MoCap Guide
Record facial performance on an ordinary smartphone, extract blendshape animation with QuickMagic, redirect ARKit-style channels to a Blender character, correct expression ranges and jitter, and send the result to Maya, Unreal Engine or Unity.
Current workflow facts
Watch the original facial-capture tutorials
Phone Video to Blender Facial MoCap
Demonstrates the original phone-video, QuickMagic and Blender facial-mocap workflow.
Open video on YouTubeQuickMagic AI + Blender Human Generator Facial Animation
Shows an optional paid Blender-character workflow using Human Generator.
Open video on YouTubeWhat facial motion capture produces
Facial motion capture converts visible expressions into time-varying controls. In a blendshape workflow, each control represents a movement such as jaw opening, eyelid closure, eyebrow raising, lip compression or cheek inflation. The animation is the sequence of coefficient values over time—not the final character mesh.
Apple documents ARKit face expressions as a dictionary of named coefficients associated with specific facial-feature movements. Those coefficients can drive 2D or 3D characters. QuickMagic's OnlyFace documentation describes an ARKit-compatible 52-blendshape workflow.
1Record a trackable phone performance
- Place the phone at eye level and keep it stable.
- Frame the face so the brows, chin and both cheeks remain visible.
- Use soft, even front or side-front lighting.
- Start with approximately two seconds of neutral expression.
- Perform clear blinks, jaw openings, smiles, frowns, lip puckers and eyebrow movements.
- Include left/right asymmetric expressions to detect mirrored mappings.
- Minimize glasses glare, hair across the eyes, hands over the mouth and rapid head turns.
- Upload the original camera file rather than a recompressed social-media copy.
| Recording choice | Recommended starting point | Why |
|---|---|---|
| Resolution | 1080p or better when available | Preserves eyes, lips and eyebrow detail |
| Frame rate | 30 FPS for normal acting; 60 FPS for fast expressions when the plan supports it | Balances curve density and visible motion detail |
| Lens | Avoid very close ultra-wide framing | Reduces facial perspective distortion |
| Head movement | Moderate and controlled | Keeps the face readable and separates expression from head pose |
2Process and validate the facial animation in QuickMagic
- Sign in to QuickMagic and open the applicable video-to-mocap workflow.
- Upload the original phone video.
- Choose facial processing or the OnlyFace format when it is available on the active plan.
- Use only the required frame range.
- Generate the animation.
- Review neutral face, blinks, jaw opening, lip closure, smiles, brows and asymmetrical expressions.
- Use 2D Refinement on supported paid plans when visible source tracking is wrong.
- Export the required FBX/facial output and preserve an untouched source file.
Understand the source and target facial channels
Minimum useful validation set
jawOpeneyeBlinkLeftandeyeBlinkRightmouthSmileLeftandmouthSmileRightbrowInnerUpmouthPucker- At least one cheek/nose expression
- Eye-look channels when the target supports them
Three mapping cases
| Source and target | Recommended approach |
|---|---|
| Names and meanings match | Create direct drivers, then tune gain and clamp. |
| Meaning matches but names differ | Create an explicit mapping dictionary. |
| Target uses joints/controllers | Map coefficients to controller transforms or attributes through drivers, nodes or driven keys. |
3Blender workflow using built-in shape keys and drivers
- Open Blender and choose File → Import → FBX.
- Import the QuickMagic facial FBX with animation enabled.
- Select the source face mesh and inspect Object Data Properties → Shape Keys.
- Scrub the timeline to confirm the source shape-key values animate.
- Load the target character into the same scene.
- Confirm the target contains shape keys or another controllable facial rig.
- For each target expression, add a driver that reads the matching source value.
- Add gain, clamp or a custom response curve when the target expression is too weak or strong.
- Test the complete clip before baking or deleting the source.
Blender script: create drivers for matching shape-key names
The script below creates clamped drivers for every target shape key whose name exactly matches a source shape key. Duplicate the Blender file before running it and change the two object names.
# Blender: create drivers for matching facial shape-key names
# Edit these two object names before running in Blender's Scripting workspace.
import bpy
SOURCE_OBJECT = "QuickMagic_SourceFace"
TARGET_OBJECT = "Target_Character"
GAIN = 1.0
source = bpy.data.objects.get(SOURCE_OBJECT)
target = bpy.data.objects.get(TARGET_OBJECT)
if source is None or target is None:
raise RuntimeError("Source or target object was not found.")
if not source.data.shape_keys or not target.data.shape_keys:
raise RuntimeError("Both objects must contain shape keys.")
source_keys = source.data.shape_keys.key_blocks
target_keys = target.data.shape_keys.key_blocks
created = []
skipped = []
for target_key in target_keys:
name = target_key.name
if name == "Basis":
continue
if source_keys.get(name) is None:
skipped.append(name)
continue
# Remove an existing driver on the target value, if present.
try:
target_key.driver_remove("value")
except TypeError:
pass
fcurve = target_key.driver_add("value")
driver = fcurve.driver
driver.type = "SCRIPTED"
variable = driver.variables.new()
variable.name = "src"
variable.type = "SINGLE_PROP"
variable.targets[0].id_type = "KEY"
variable.targets[0].id = source.data.shape_keys
escaped = name.replace("\\", "\\\\").replace('"', '\\"')
variable.targets[0].data_path = f'key_blocks["{escaped}"].value'
# Clamp to the common 0–1 target range.
driver.expression = f"min(max(src * {GAIN}, 0.0), 1.0)"
created.append(name)
print(f"Created {len(created)} drivers.")
print("Skipped unmatched target keys:", skipped)
After running the script
- Scrub the timeline and confirm the target animates.
- Review the printed list of unmatched target keys.
- Manually map differently named channels.
- Change
GAINor individual driver expressions where needed. - Test left/right channels carefully.
Optional Human Generator workflow
Human Generator is a paid Blender character-generation add-on, not a QuickMagic requirement. The current marketplace listing supports modern Blender versions, but purchase tier, Blender compatibility and transfer tools should be verified on the current product page.
- Install Human Generator through its documented Blender add-on workflow.
- Create or load a character with a facial shape-key system.
- Import the QuickMagic source FBX.
- Compare source and target shape-key names.
- Use the add-on's documented transfer feature when it explicitly supports the source data, or use Blender drivers.
- Adjust target-specific expression strength and corrective shapes.
Clean and calibrate the facial animation
Expression too weak
Increase the channel gain or use a steeper response curve on that specific expression.
Expression too strong or clips the face
Clamp the target value and reduce the gain. Check whether multiple shapes are over-combining.
Blinks are incomplete
Verify eyelids were visible in the video, then tune blink gain and add a corrective shape if the target eyelid deformation is incomplete.
Lip sync feels soft
Preserve jaw opening and lip closures. Avoid broad smoothing that removes consonant timing.
Left and right expressions are reversed
Test a one-sided smile and eyebrow raise, then correct mirrored source/target mapping.
Jitter
Smooth only the visibly noisy channel intervals. Preserve natural eye darts, blinks, speech articulation and asymmetrical acting.
Use the same facial data in Maya, Unreal Engine and Unity
Maya
Connect source coefficients to target Blend Shape node weights with the Connection Editor, driven keys or utility/remap nodes. Use the Graph Editor for calibration and bake the destination controls only when required.
Unreal Engine
Enable morph-target import when importing the relevant FBX. Unreal can encapsulate morph-target animation in an Animation Sequence and expose the individual morph curves. MetaHuman use requires a separate, compatible curve-mapping workflow.
Unity
Unity exposes mesh blend-shape weights through the SkinnedMeshRenderer. Animate them in an Animation Clip or set them at runtime through scripting. Confirm whether the imported FBX includes the required curves for the target mesh.
Common facial-capture problems
| Problem | Likely cause | Recommended fix |
|---|---|---|
| Only Face is missing | Current Free plan or unsupported workflow | Check Starter/Professional entitlement and the active export menu. |
| No shape-key animation after Blender import | Curves linked to another object/action or unsupported source layout | Inspect source objects, shape keys, actions and the FBX importer result. |
| Target face does not move | No drivers/mapping or target has no compatible facial controls | Create explicit drivers or map to joints/controller attributes. |
| Jaw works but lips and cheeks do not | Only a subset of channels is mapped | Audit the complete source/target channel list. |
| Face looks distorted | Target range, neutral pose or corrective shapes differ | Reduce gain, clamp values and add target-specific correctives. |
| Eyes look crossed or stare | Eye-look channels are missing, reversed or too strong | Map eye channels separately and cap their range. |
| Animation is noisy | Video blur, occlusion or over-sensitive target response | Improve source footage and smooth only verified noisy channels. |
| Unreal/Unity import has morphs but no animation | Animation curves were not exported/imported for the target mesh | Verify FBX curve export, import settings and animation-clip association. |
Final quality checklist
- The face is evenly lit and consistently visible.
- The performance begins from a neutral reference.
- Blinks, jaw, brows, smiles and asymmetric expressions are present.
- The active QuickMagic plan provides the required facial output.
- The source FBX retains its facial animation after import.
- The target has compatible shape keys, joints or controls.
- Left/right mappings are correct.
- Expression ranges are calibrated per channel.
- Smoothing does not remove speech or blink timing.
- The final exported animation is validated in the destination application.
Frequently asked questions
Can I capture facial animation with an ordinary phone?
Yes. QuickMagic uses standard uploaded RGB video, so a depth sensor is not required. Use stable, close, evenly lit footage.
Is OnlyFace included in the Free plan?
The current plan table lists FBX for Free and Only Face among Starter and Professional formats. Check the active export screen because entitlements can change.
Does ARKit-compatible mean automatic compatibility?
No. It provides familiar channel names, but the target still needs compatible shapes or a mapping. Expression ranges and geometry differ between characters.
How do I transfer the animation in Blender?
Import the source FBX, inspect the animated shape keys, then connect each source value to a target shape key with drivers or copied curves.
Do I need Human Generator?
No. It is an optional paid character add-on. Blender's built-in shape keys and drivers are sufficient for a compatible custom character.
Why are expressions too weak or strong?
The source and target ranges differ. Tune gain and clamp per channel, and add custom response curves for stylized characters.
Can I use the result in Unreal Engine or Unity?
Yes. Unreal supports morph-target animation through FBX, while Unity exposes blend shapes through SkinnedMeshRenderer. The target mesh and curves still need compatible mapping.
How do I reduce facial jitter?
Improve source lighting and visibility, correct source tracking when possible, then smooth only the visibly noisy channels without removing articulation or blinks.
Related QuickMagic guides
Test facial mapping with a short expression set
Record neutral, blink, jaw open, smile, frown, brow raise and left/right expressions, then validate the target mapping before processing a long dialogue performance.
Official references and video sources
- QuickMagic: Original phone facial-capture guide
- QuickMagic: Current plan limits and Only Face availability
- QuickMagic: OnlyFace and ARKit-compatible 52-blendshape description
- Apple: ARFaceAnchor blendShapes
- Apple: BlendShapeLocation identifiers
- Blender: Shape Keys
- Blender: FBX import and shape-key actions
- Epic Games: FBX Morph Target Pipeline
- Unity: Work with blend shapes
- Human Generator: Current product page and Blender compatibility
- Phone Video to Blender Facial MoCap
- QuickMagic AI + Blender Human Generator Facial Animation




