QuickMagic lets you turn any video into production-ready 3D animation data — no mocap suit, no markers, no expensive camera setup. This guide walks through the complete pipeline: from recording your video all the way to seeing your character move in Unreal Engine 5.
Whether you are building a game, creating cinematics, or prototyping character animation, this workflow replaces hours of manual keyframing with minutes of AI processing

1. What You Need Before Starting

If you are new to QuickMagic, start with the Basic Operation Guide first, then come back here.
2. Step 1: Record or Prepare Your Video
QuickMagic works with regular video from any camera — smartphone, webcam, DSLR, or screen recording. For best results:

If you are capturing face/hand details alongside body motion, make sure hands and face are clearly visible and well-lit. QuickMagic supports simultaneous full-body, hand, and facial capture in a single upload.
3. Step 2: Upload and Process in QuickMagic
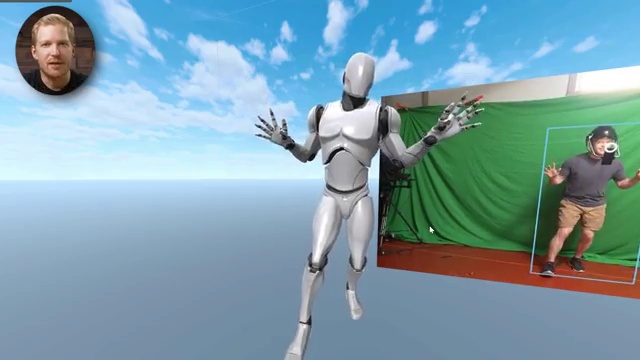
3.1 Upload Your Video
- Open quickmagic.ai and sign in
- Navigate to the Video to 3D Animation workspace
- Click the upload area and select your video file
- While the upload proceeds, configure the processing options below
3.2 Configure Capture Settings
QuickMagic offers several capture modes. Choose based on your source footage:

3.3 Start Processing
Click Start Processing and wait 1-3 minutes (depending on video length and selected features). You will see a real-time preview of the extracted skeleton animation. If the result has noticeable jitter or artifacts, adjust the settings and re-process before exporting.
4. Step 3: Export the FBX Animation File
Once processing completes, you will see the export panel:
4.1 Choose the Right Format
QuickMagic supports two export paths for Unreal Engine:

Recommendation: Start with UE5.5 / UE5.6 native export. It is the fastest path to seeing your animation on a character. Switch to generic FBX only when working with custom rigs.
4.2 Download the File
- Select your format from the dropdown
- Click Download
- Save the
.fbxfile to a dedicated project folder (e.g.,QuickMagic_Exports/)
More details on every supported format: Export Formats & Software Compatibility Guide
5. Step 4: Import the FBX into Unreal Engine 5
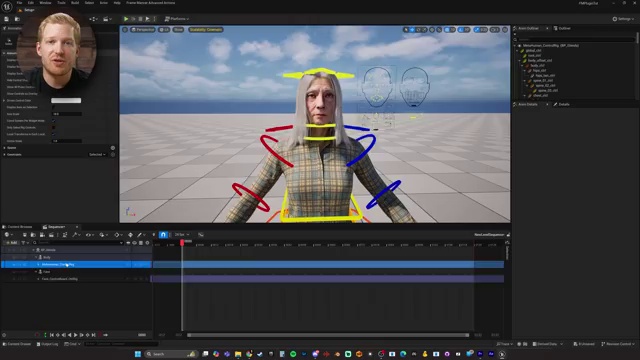
5.1 Import the Animation
- Open your UE5 project
- In the Content Browser, navigate to your animation folder (create
Content/Animations/QuickMagic/if it doesn't exist) - Click Import and select your FBX file
- In the FBX Import Options dialog, configure these critical settings:

5.2 Verify the Animation
Double-click the imported Animation Sequence in the Content Browser. The preview window should show the skeleton animating. If you see a static T-pose instead, the skeleton mapping failed — proceed to Section 6 for the solution.
6. Step 5: Retarget the Animation to Your Character
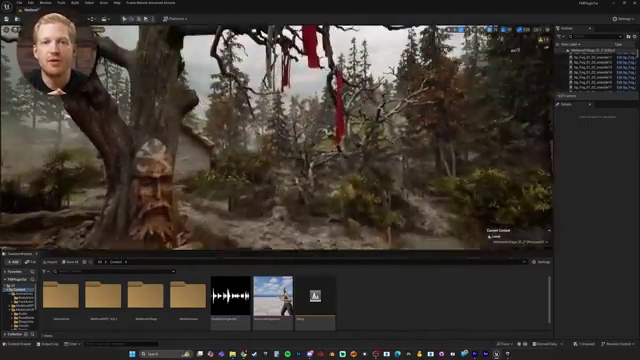
If you used UE5.5 / UE5.6 native export, skip this section — your animation is already compatible with the UE5 Mannequin skeleton.
If you used generic FBX or your target character uses a different skeleton (MetaHuman, Paragon, custom rig), you need IK Retargeting.
6.1 Create an IK Rig for the Source Animation
- In the Content Browser, right-click → Animation → IK Rig
- Name it
IKRig_QuickMagic - Set Preview Mesh to the skeletal mesh associated with the imported QuickMagic animation
- Add these basic IK chains:

6.2 Create an IK Rig for Your Target Character
Repeat the same steps for your target character:
- Create a new IK Rig named
IKRig_TargetCharacter - Set Preview Mesh to your character's skeletal mesh
- Add the same IK chains (
LeftLeg,RightLeg,Spine) mapped to the corresponding bones - Save
6.3 Create the IK Retargeter
- Right-click → Animation → IK Retargeter
- Name it
RTG_QuickMagic_to_Target - Source → select
IKRig_QuickMagic - Target → select
IKRig_TargetCharacter - In the Chain Mapping panel, map each source chain to its target:
- Click Auto-Map to let UE5 attempt automatic matching, then verify each mapping
- Save
6.4 Batch Retarget the Animations
- In the Content Browser, select all QuickMagic Animation Sequences
- Right-click → Retarget Anim Assets → Duplicate and Retarget
- Select
RTG_QuickMagic_to_Targetas the retargeter - Choose an output folder (e.g.,
Content/Animations/QuickMagic/Retargeted/) - Click Retarget
UE5 generates new Animation Sequence assets compatible with your target character.
For a deeper dive with MetaHuman characters: see the MetaHuman Retargeting Guide for UE5.
7. Step 6: Play the Animation on Your Character
7.1 Quick Test in the Level
For a fast sanity check without modifying any blueprints:
- Drag your character into an open level
- Open Level Blueprint (Blueprints menu → Open Level Blueprint)
- Add an Event BeginPlay node
- Connect a Play Animation node referencing your retargeted Animation Sequence
- Click Play — your character should animate on start
7.2 Integrate into Animation Blueprint
For production use, add the animation to your character's Animation Blueprint:
- Open the Animation Blueprint assigned to your character
- In the AnimGraph, create a new state in your state machine
- Inside the state, reference your QuickMagic Animation Sequence
- Add a Transition Rule to trigger it (key press, gameplay event, timeline, etc.)
Example state machine structure:
7.3 Enable Root Motion (If Needed)
If your animation includes character displacement (walking, running):
- Open the Animation Sequence
- In the toolbar, enable Root Motion
- In the character's Animation Blueprint, set Root Motion Mode to Root Motion from Everything
8. Step 7: Polish and Fine-Tune
Animation Speed Adjustment
If the playback feels too fast or too slow:
- Open the Animation Sequence
- In the Asset Details panel, adjust Rate Scale:
1.0= original speed1.5= 50% faster0.8= 20% slower
Reduce Jitter and Noise
AI motion capture can introduce subtle jitter. Smooth it out:
- Open the Animation Sequence
- Right-click the curve track → Apply Filter or use Animation Compression settings
- For persistent jitter, re-process the video in QuickMagic with Anti-Penetration Correction enabled
Blend with Other Animations
Combine QuickMagic animations with gameplay systems:
- Upper body layering: Use the Layered Blend Per Bone node in the AnimGraph to overlay a QuickMagic upper-body animation on a walking cycle
- Additive blending: Apply subtle adjustments as additive layers on top of base animations
9. Common Issues & Troubleshooting

10. Pro Tips for Production Workflows
Batch Processing Strategy
- Upload multiple videos simultaneously — QuickMagic queues them and processes in parallel
- Create a consistent file-naming convention:
QM_[Character]_[Action]_[Date].fbx - Keep original FBX exports in a
Source/folder; retargeted versions in aRetargeted/folder
MetaHuman Performance Capture Pipeline
QuickMagic's body motion capture pairs seamlessly with MetaHuman:
Quality Optimization Checklist
Before processing large batches, run this checklist on one test video:
- Video has clear, even lighting
- Subject fills 60-80% of the frame
- No occlusions (objects blocking limbs)
- Anti-Penetration Correction is enabled
- Output frame rate matches project settings
- Preview animation looks clean before exporting
See the full Motion Capture Quality Optimization Tips for advanced settings.
11. Complete Workflow Summary

12. Related Tutorials
- QuickMagic Basic Operation Guide — Getting started with upload, processing, and export
- Export Formats & Software Compatibility Guide — Which format to use for each DCC tool
- Motion Capture Quality Optimization Tips — Advanced settings for cleaner tracking
- Common Motion Capture Issues & Solutions — Troubleshooting reference
- MetaHuman Retargeting Guide for UE5 — Full MetaHuman pipeline
- Blender Tutorial: How to Remap Bones — Bone mapping concepts applicable to any DCC
13. References & Community
- Video walkthrough: Budget Mocap Tutorial — QuickMagic.AI and Metahuman Animator in Unreal Engine 5 by Charlie Driscoll (31K subscribers, 90K+ views)
- Epic official docs: IK Rig Animation Retargeting in UE5
- Epic community: UE 5.6 Advanced Cinematics — Integrate Motorica with QuickMagic
- Need help? Reach out via the QuickMagic website for support.